Configuration — WooCommerce
All EasyReturn settings are available in your WordPress admin under Easy Return → Settings. The settings panel is divided into five tabs: General, Return Settings, Email, Element Injection, and Information and Support.
General
Set up your store's basic information. This data is used for service registration, confirmation emails, and as the return address shown to customers.
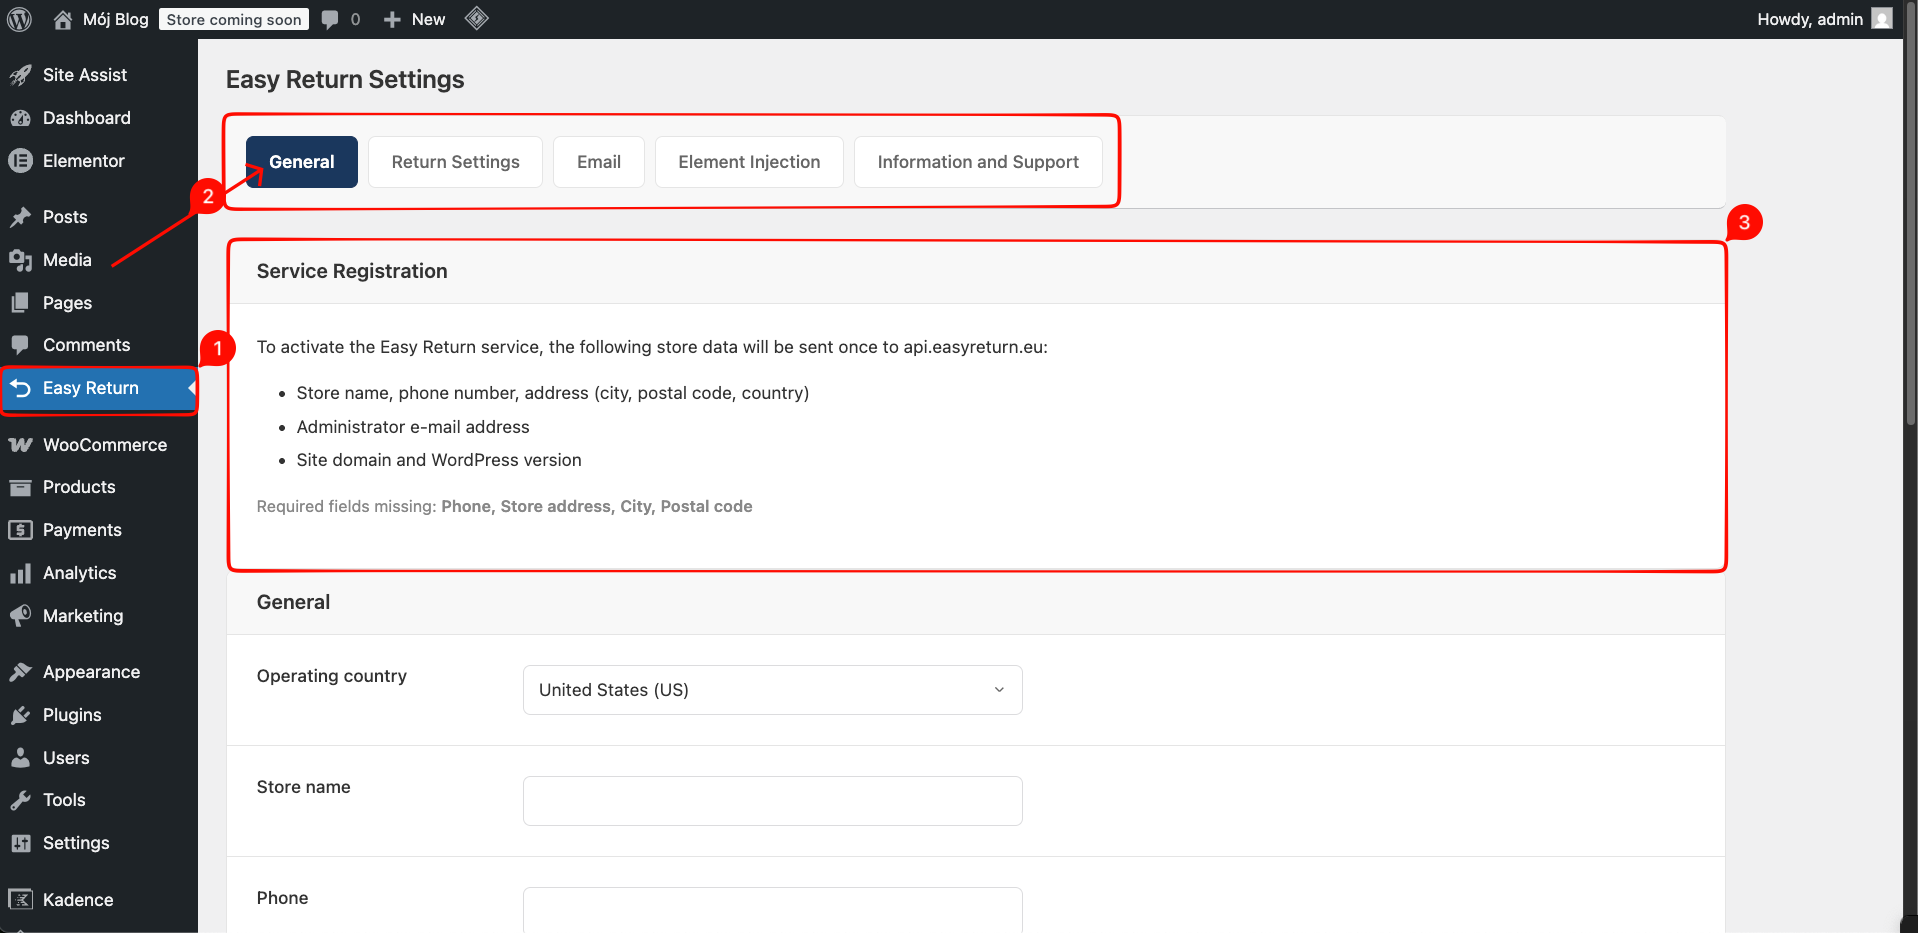
Service Registration
To activate the Easy Return service, the following store data will be sent once to api.easyreturn.eu:
- Store name, phone number, address (city, postal code, country)
- Administrator e-mail address
- Site domain and WordPress version
If any required fields are missing, the plugin displays a warning, e.g.: Required fields missing: Phone, Store address, City, Postal code.
Operating country
Select the country your store operates in.
Store name
Your store's trading name. Appears in the return form.
Phone, address, city, postal code
The return address shown to customers after a withdrawal is submitted. This is where customers send their products back.
Store email
Appears on the label (sometimes required by the carrier).
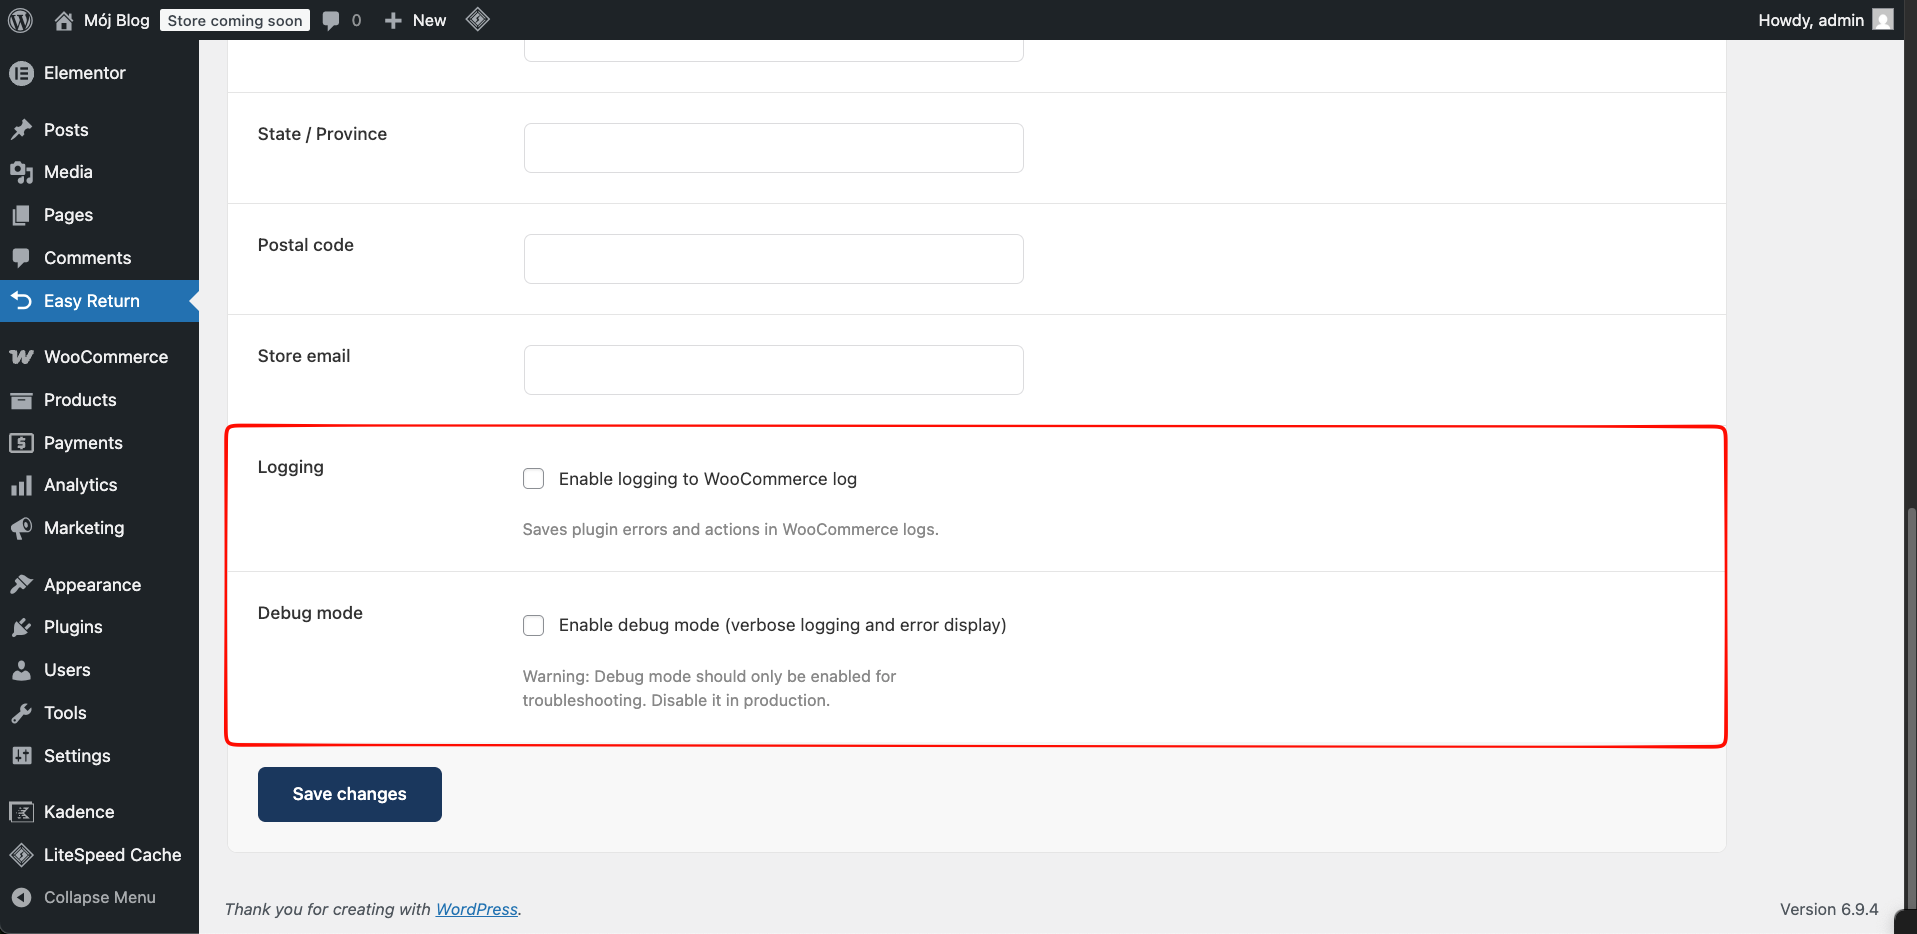
Logging
Saves plugin errors and actions to the WooCommerce log. Logs are accessible under WooCommerce → Status → Logs.
Debug mode
Enables verbose logging and error display on screen. Use only for troubleshooting - disable in production.
Return Settings
Control the return window, eligible order statuses, and what the customer sees on the return form.
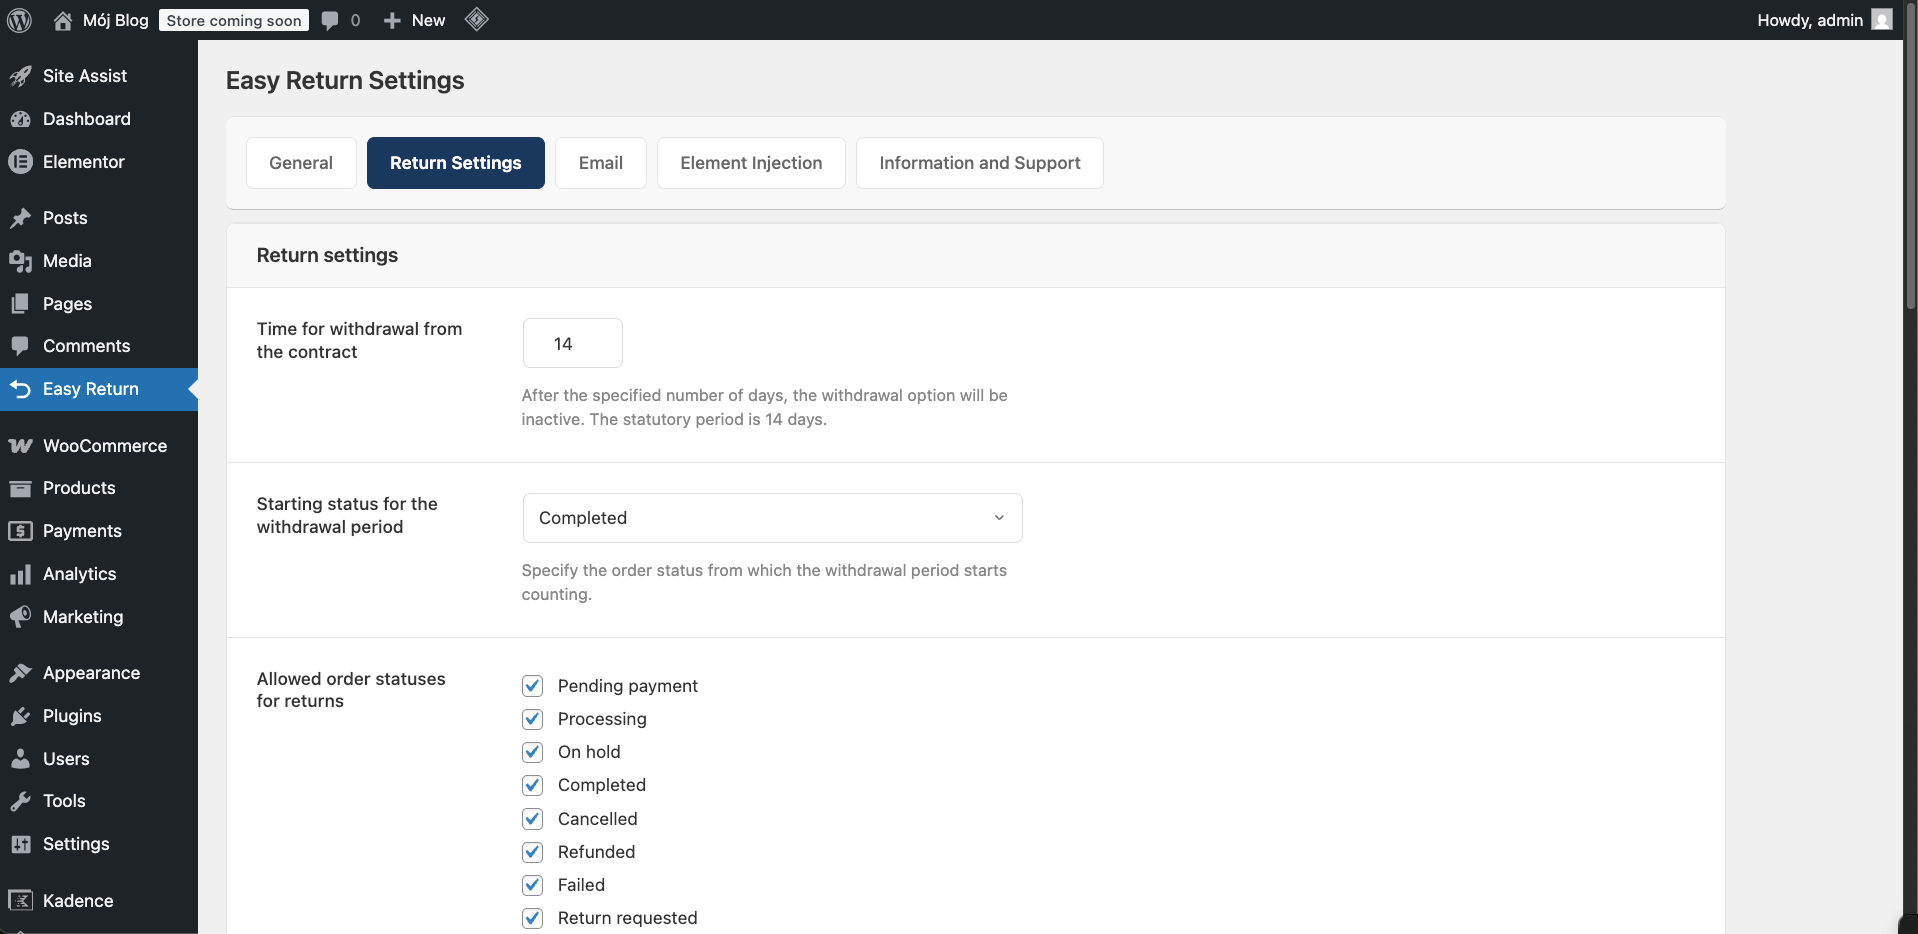
Time for withdrawal from the contract
Number of days during which a customer can submit a return request. After this period the returns button becomes inactive. Defaults to 14 days - the statutory period set by law.
Starting status for the withdrawal period
The withdrawal period is counted from the date the consumer receives the goods. If your store does not have an order status that reflects actual delivery, extend the withdrawal period to account for shipping time. If a withdrawal is submitted more than 14 days after the date of receipt, you may reject it.
Allowed order statuses for returns
Select which WooCommerce order statuses allow customers to initiate a return. If none are selected, all statuses are allowed.
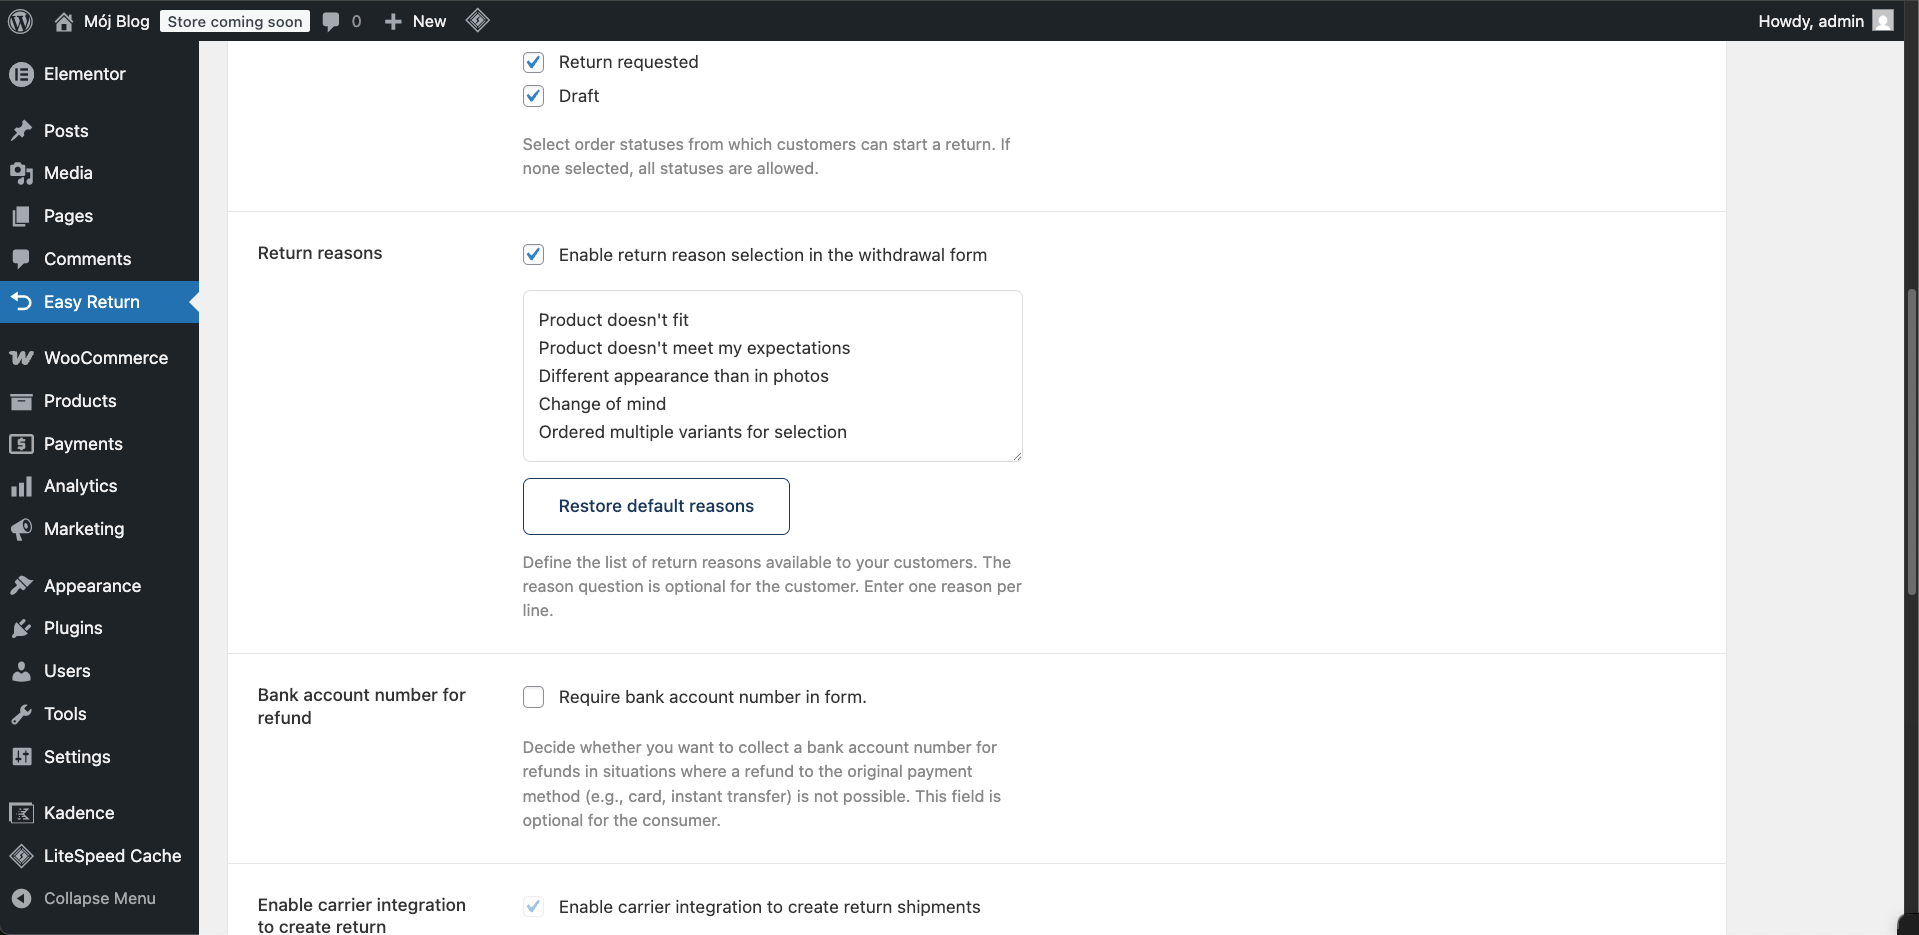
Return reasons
Enables a reason selection field on the return form. The field is optional for the customer. Edit the list in the textarea - one reason per line. Click Restore default reasons to reset to the built-in list.
Bank account number for refund
Adds an optional bank account field to the return form. Useful when the original payment method does not support automatic refunds, e.g. for orders paid with cash on delivery (COD).
Enable carrier integration to create return shipments
Allows customers to generate a return shipment label directly from the return form. Available in selected countries - the option is enabled automatically once launched for your region.
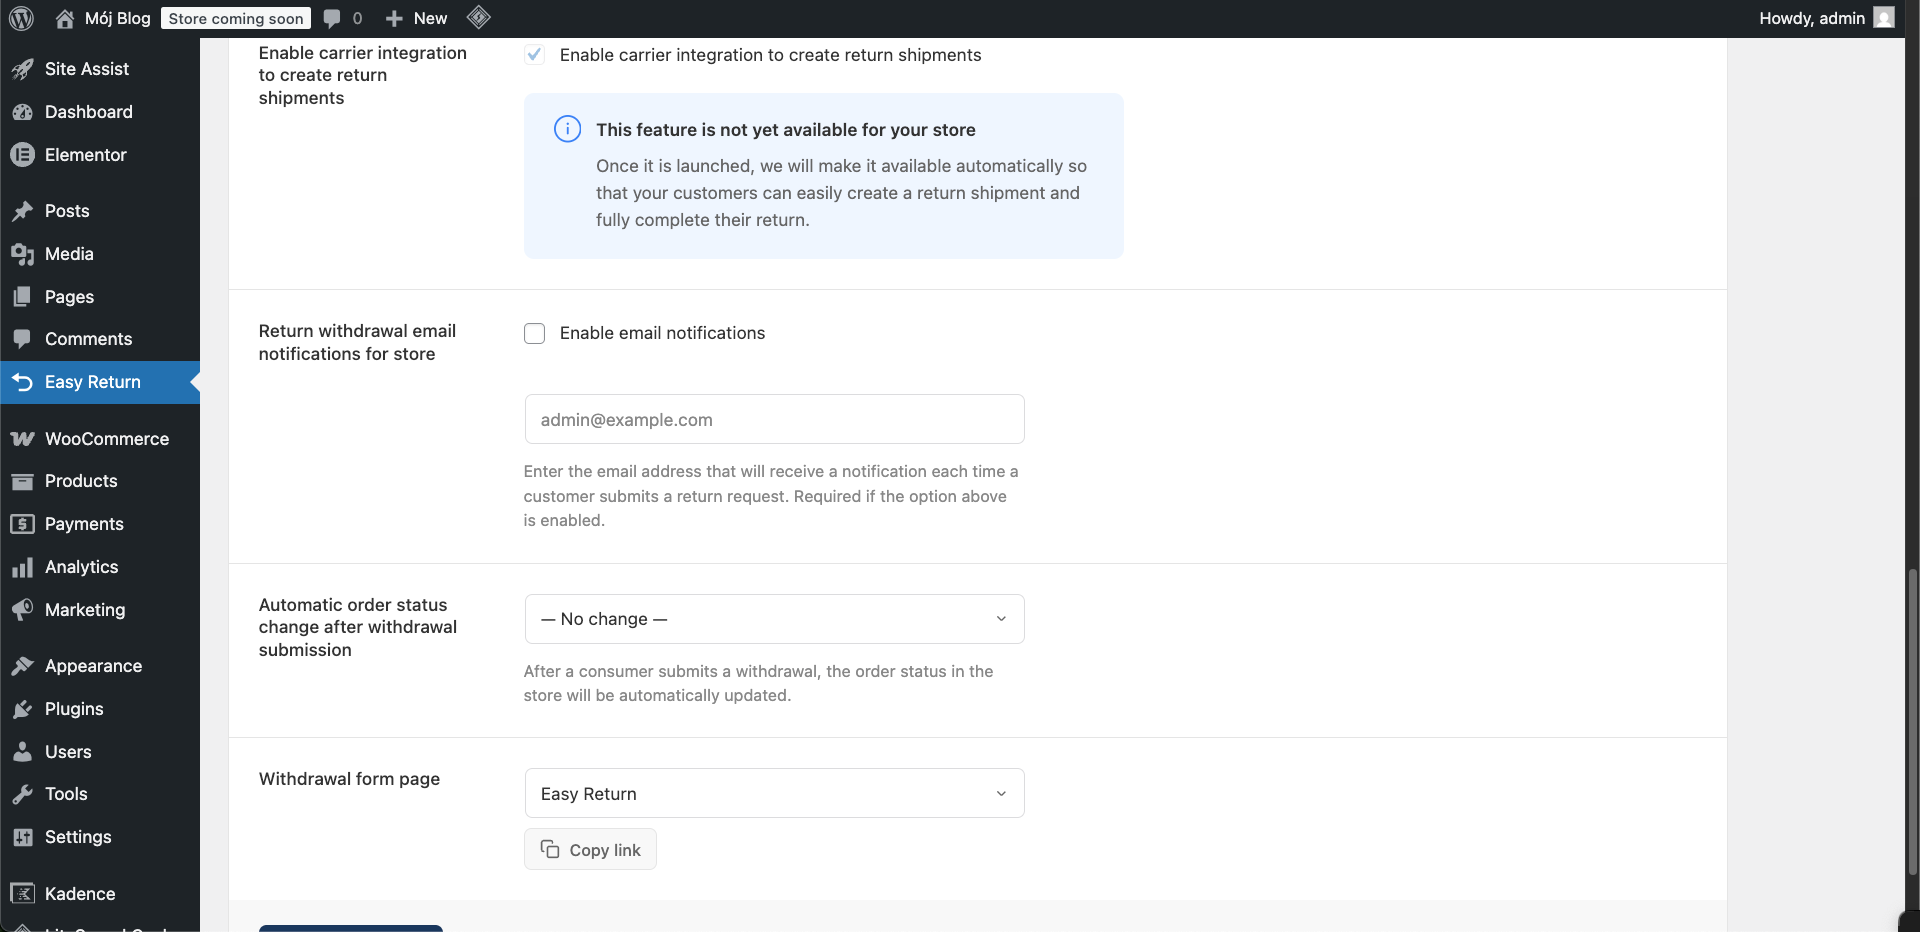
Return withdrawal email notifications for store
When enabled, sends an email to the specified address each time a customer submits a withdrawal.
Automatic order status change after withdrawal submission
Optionally set a WooCommerce order status to apply automatically after a return is submitted. Defaults to No change.
Withdrawal form page
The WordPress page that hosts the return form, created automatically during plugin activation. Use Copy link to get the direct URL and place it anywhere - for example in your terms and conditions or FAQ.
Customize the confirmation email sent to customers after a withdrawal is submitted. The email is built from an HTML template with dynamic tags replaced with real data at send time.
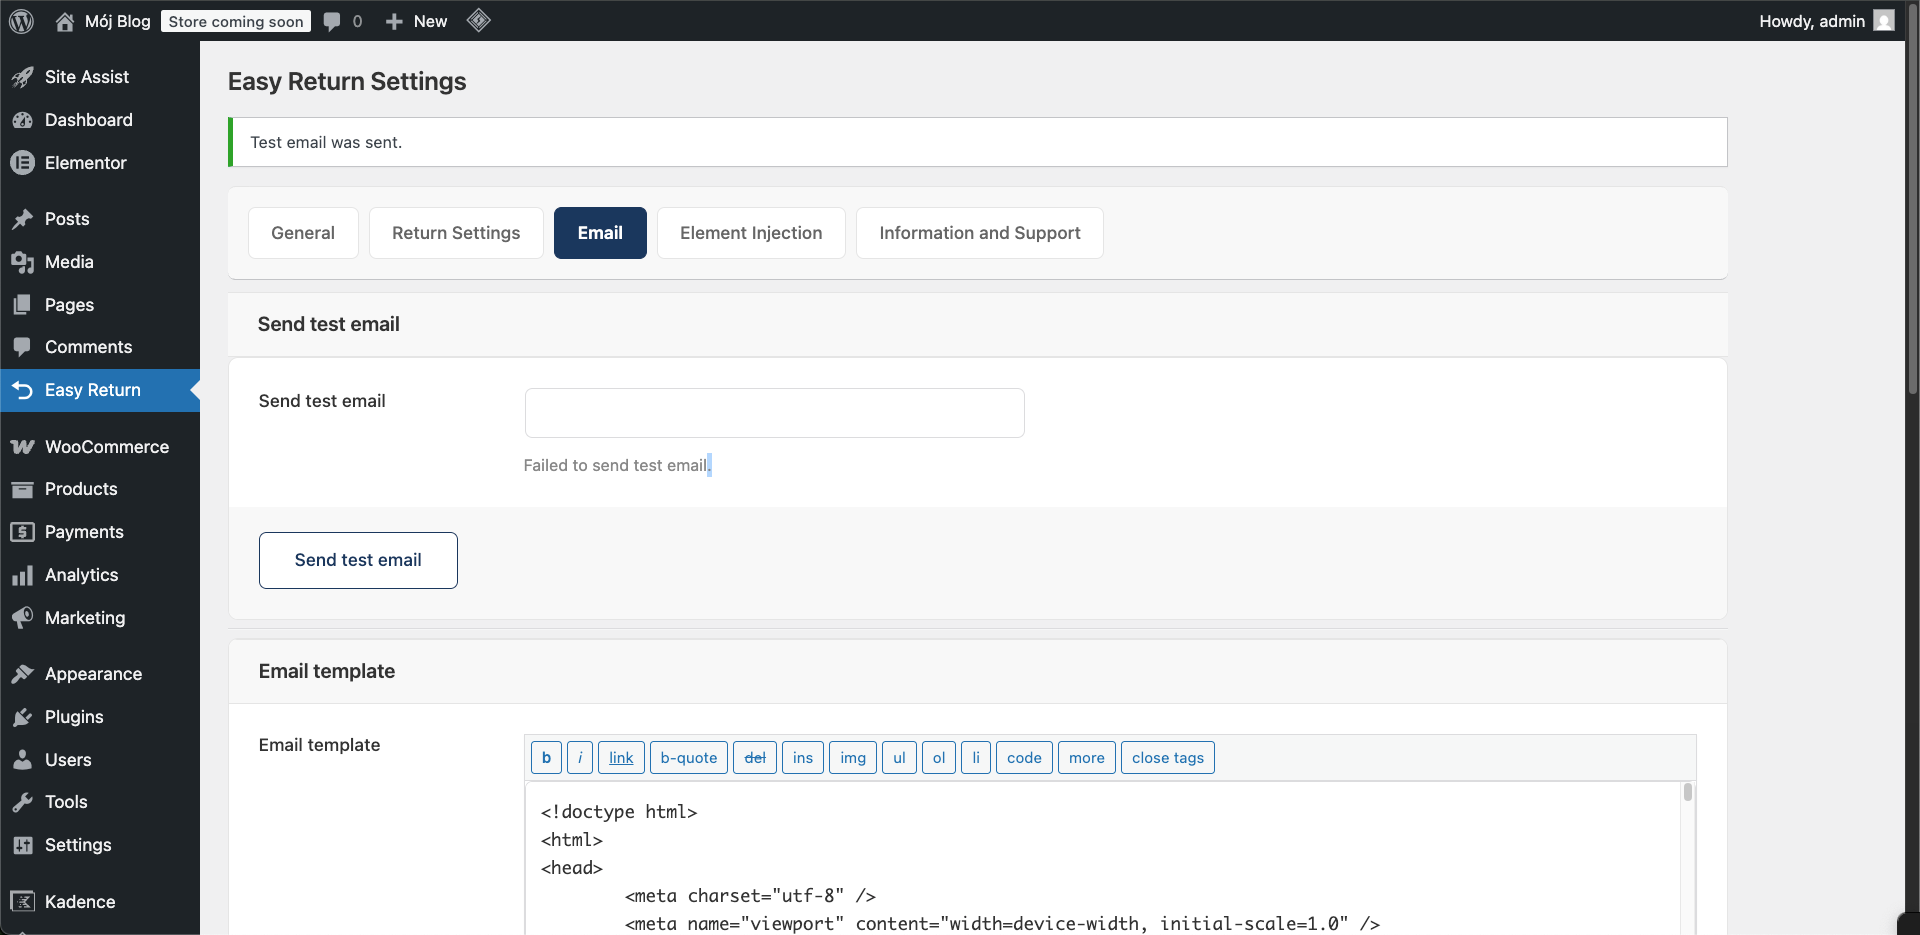
Send test email
Enter any email address and click Send test email to preview how the confirmation email will look. Useful for checking formatting before going live.
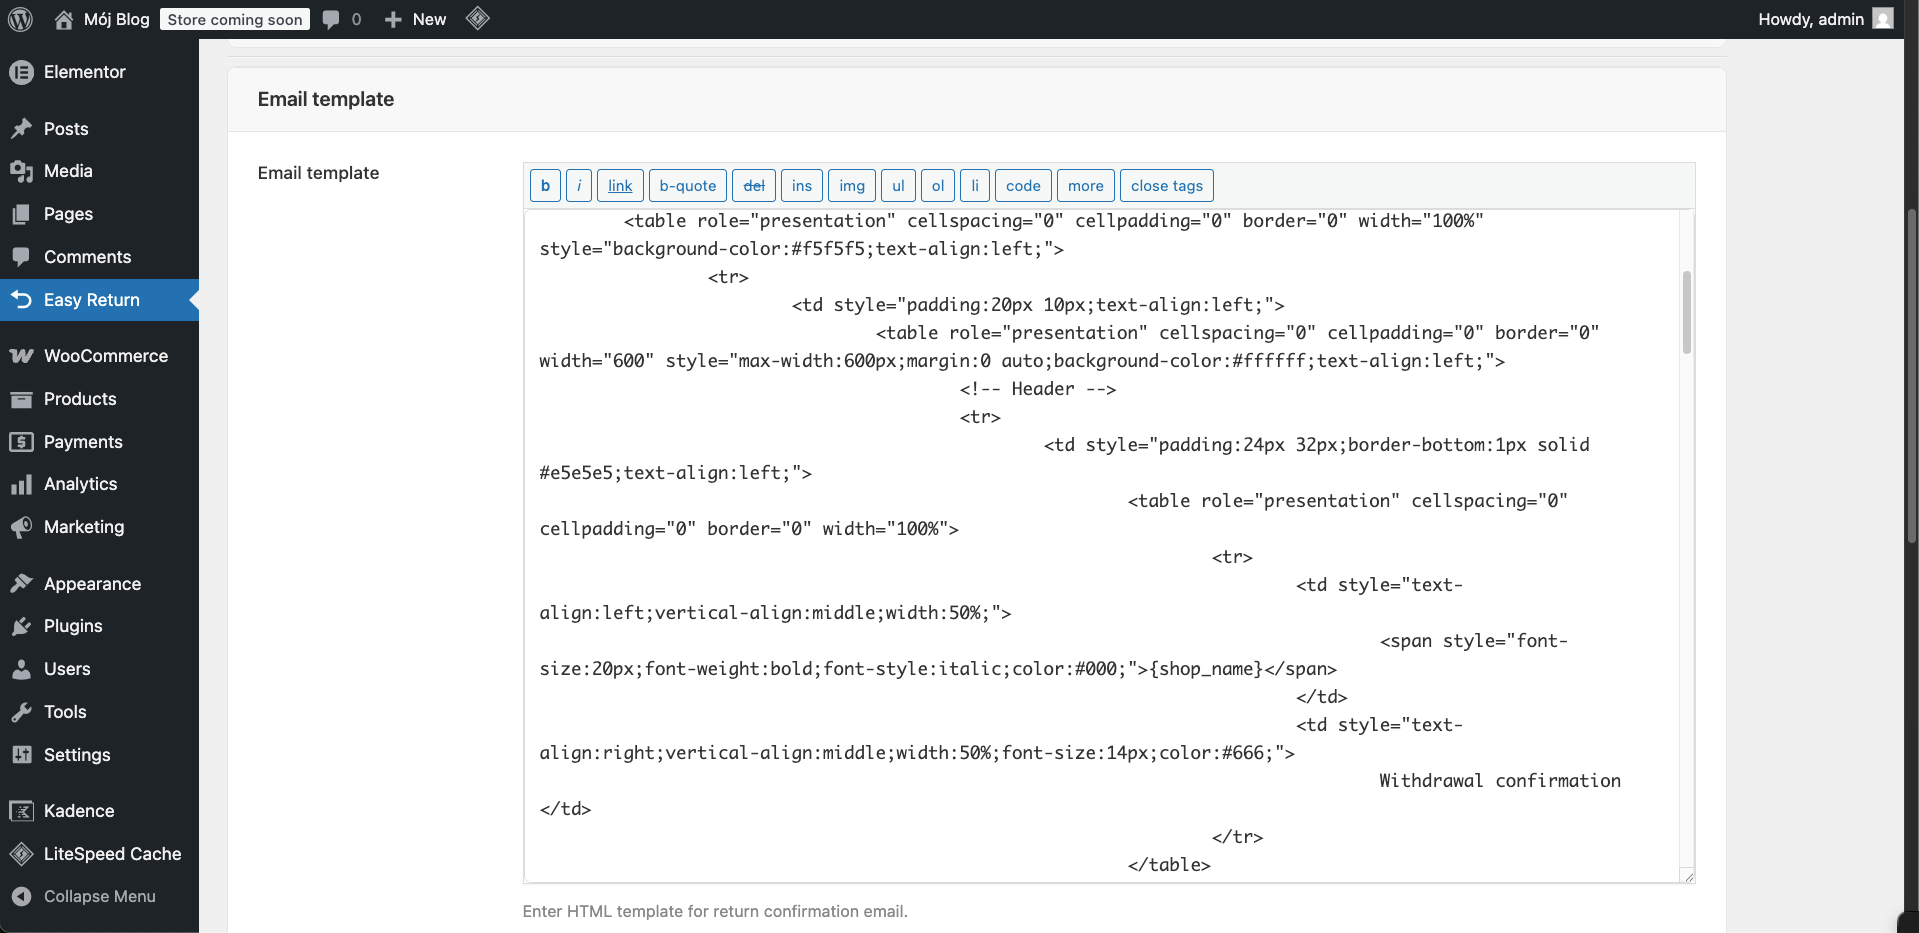
Email template
The full HTML of the confirmation email. Edit it directly in the editor. Use the formatting toolbar for basic markup, or paste your own HTML for full control.
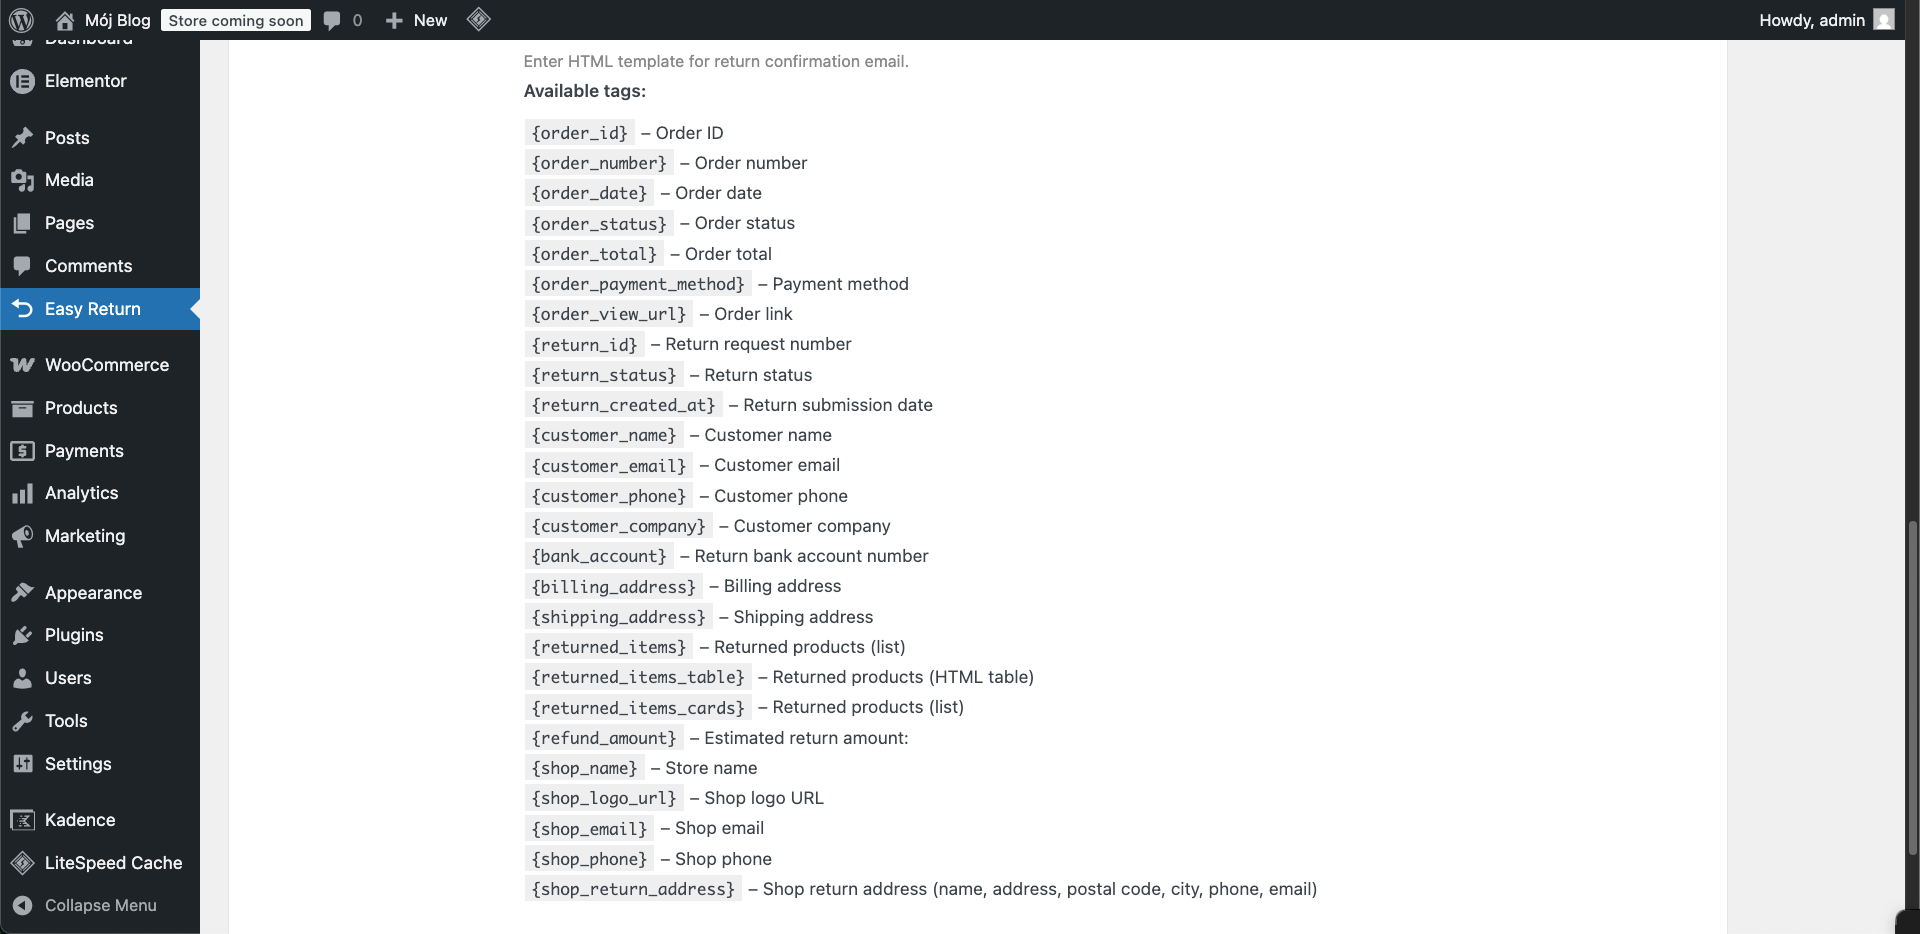
Available tags
Insert these tags anywhere in the template - they are replaced with real values when the email is sent.
Order
- {order_id} - Order ID
- {order_number} - Order number
- {order_date} - Order date
- {order_status} - Order status
- {order_total} - Order total
- {order_payment_method} - Payment method
- {order_view_url} - Order link
Return
- {return_id} - Return request number
- {return_status} - Return status
- {return_created_at} - Return submission date
Customer
- {customer_name} - Customer name
- {customer_email} - Customer email
- {customer_phone} - Customer phone
- {customer_company} - Customer company
- {bank_account} - Return bank account number
- {billing_address} - Billing address
- {shipping_address} - Shipping address
Products & Store
- {returned_items} - Returned products (list)
- {returned_items_table} - Returned products (HTML table)
- {returned_items_cards} - Returned products (cards)
- {refund_amount} - Estimated return amount
- {shop_name} - Store name
- {shop_logo_url} - Shop logo URL
- {shop_email} - Shop email
- {shop_phone} - Shop phone
- {shop_return_address} - Shop return address
Use Reset to defaults to restore the original email template if needed.
Element Injection
Control where and how the returns button and widget appear on the storefront. Each element can be enabled independently and styled to match your store.
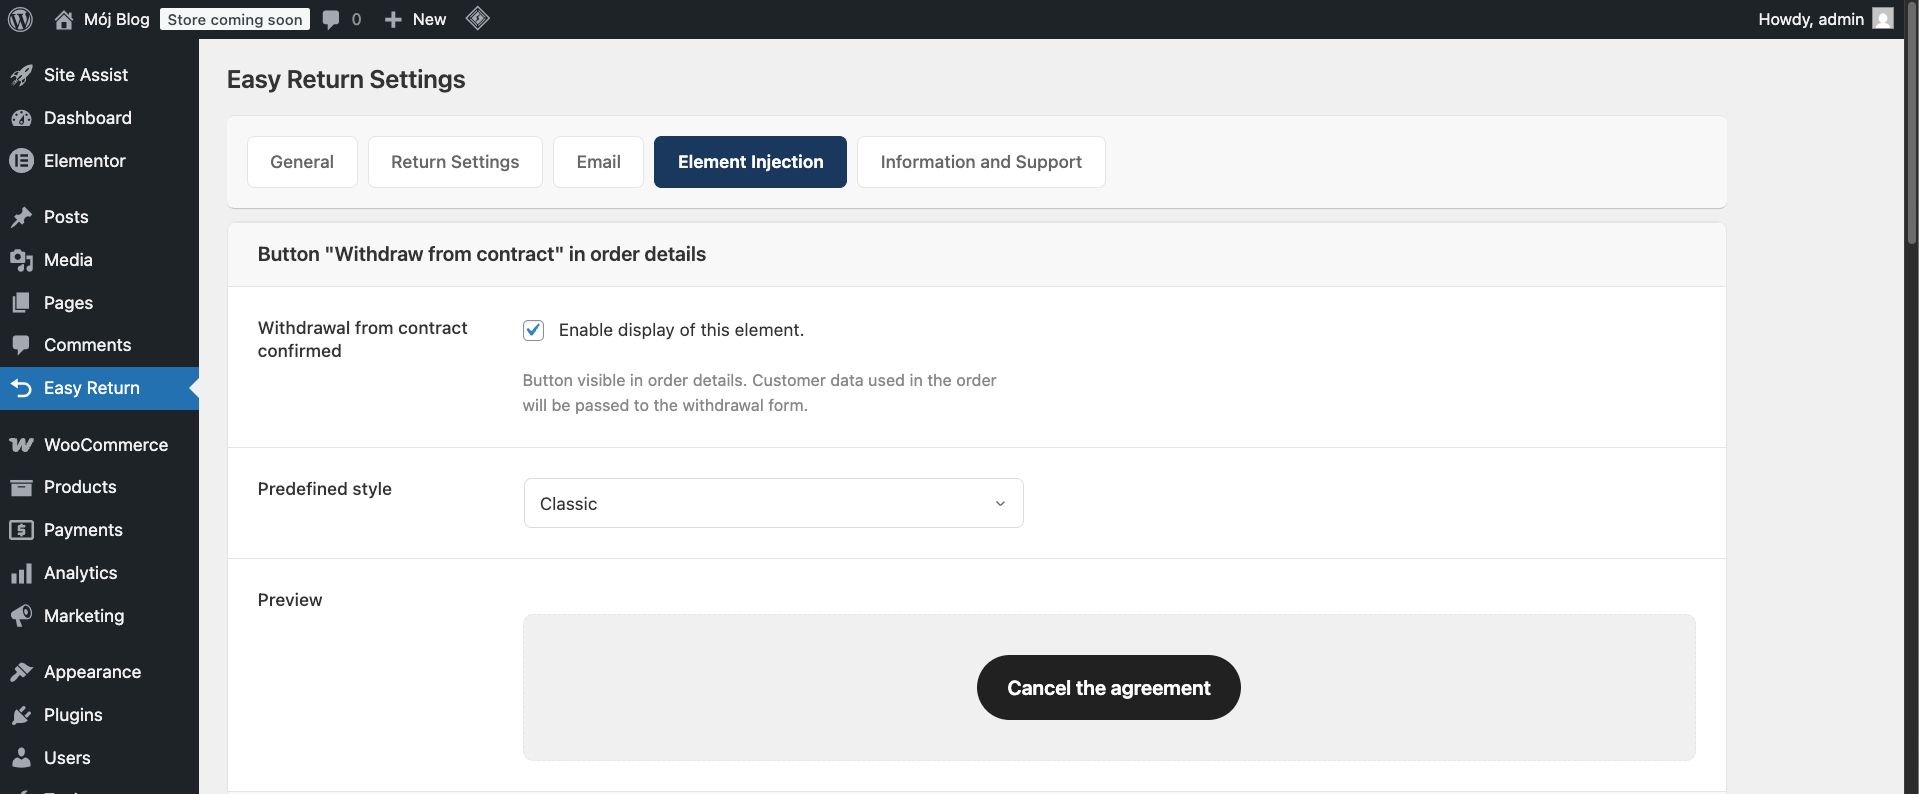
Button "Withdraw from contract" in order details
When enabled, the button appears on the customer's order details page. Customer data from the order is passed automatically to the return form. Choose a predefined style from the dropdown - the preview shows how the button will appear (e.g. "Cancel the agreement").
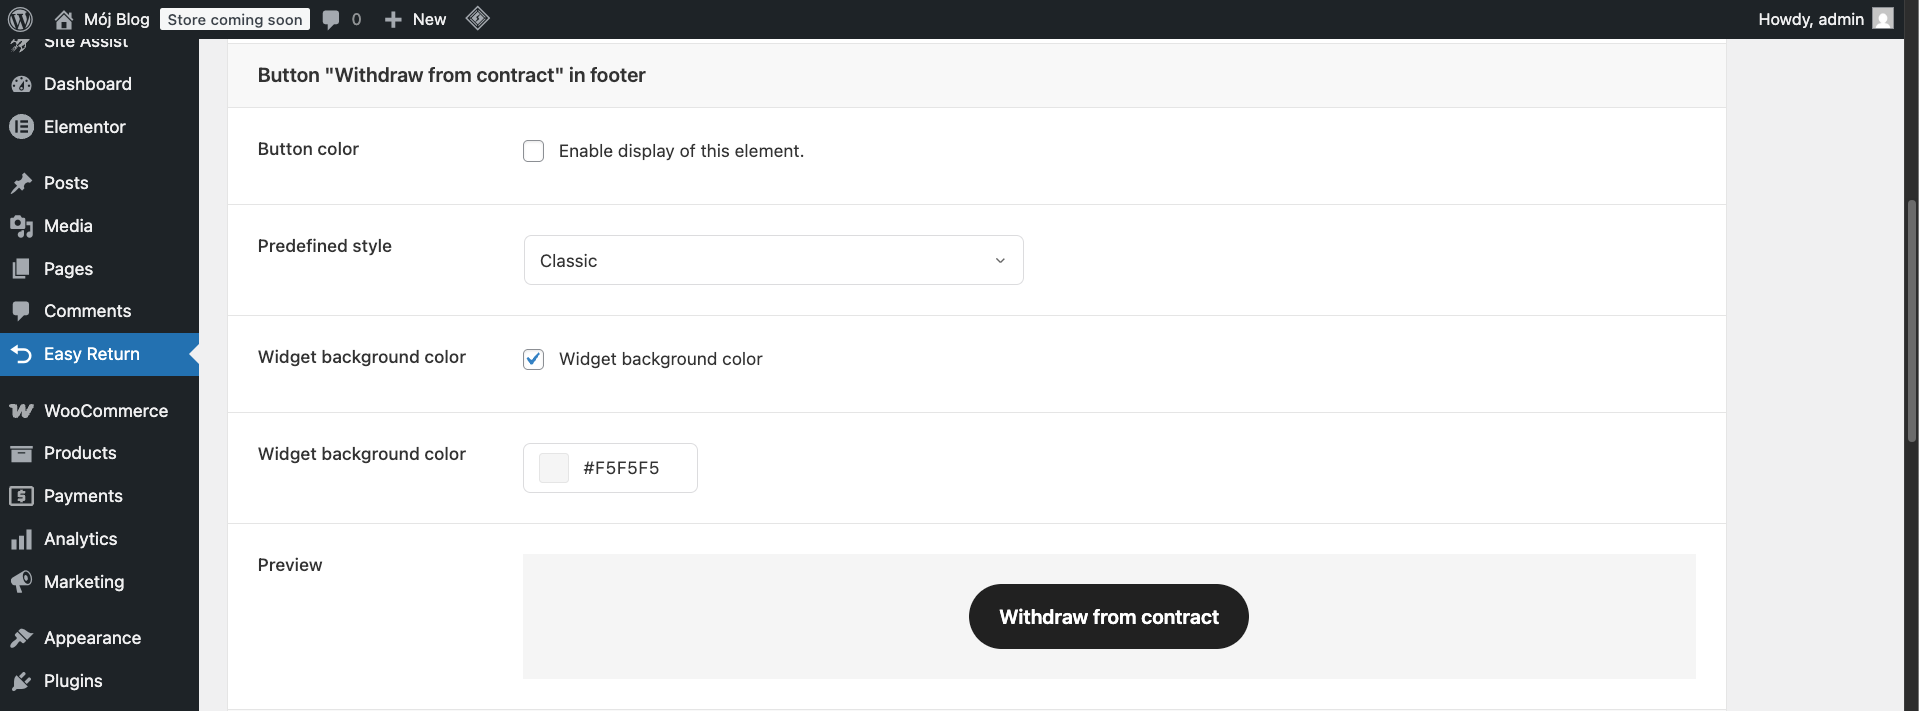
Button "Withdraw from contract" in footer
Adds the returns button to the site footer. Disabled by default. You can set a predefined style, enable a widget background, and set its hex color value.
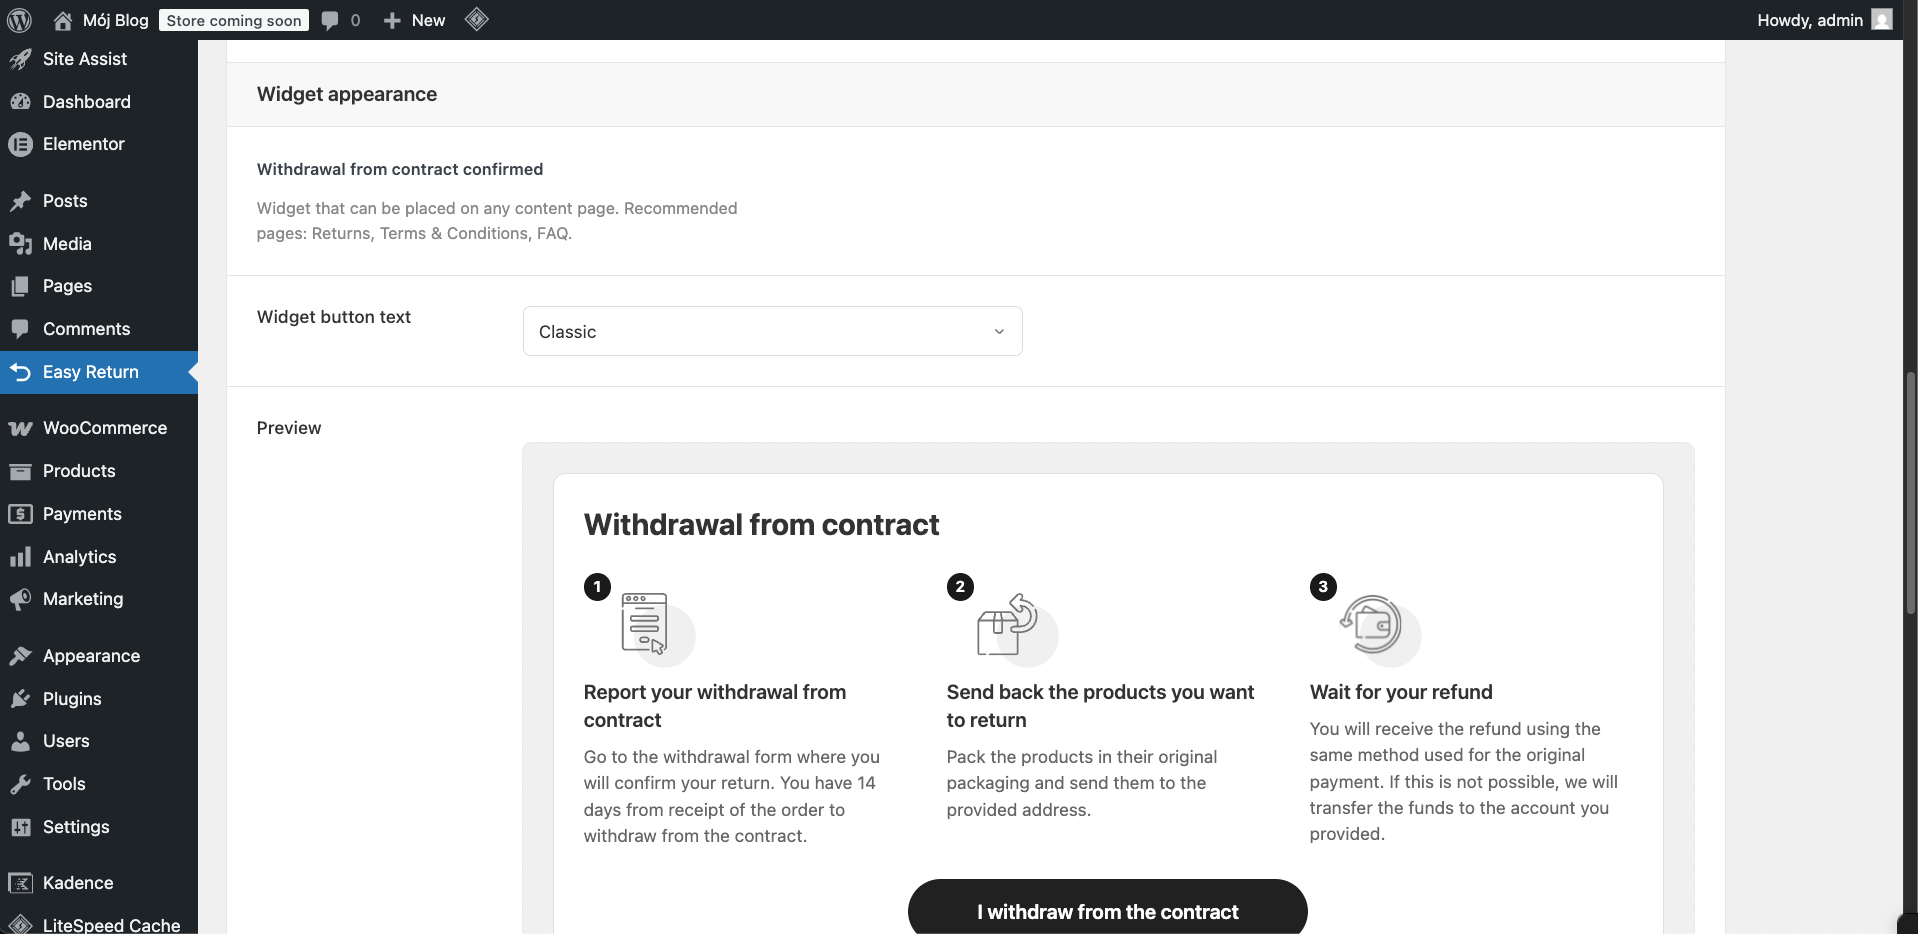
Widget
A full informational widget that can be placed on any content page. Recommended on Returns, Terms & Conditions, and FAQ pages. It explains the return process in three steps and includes a button linking to the return form.
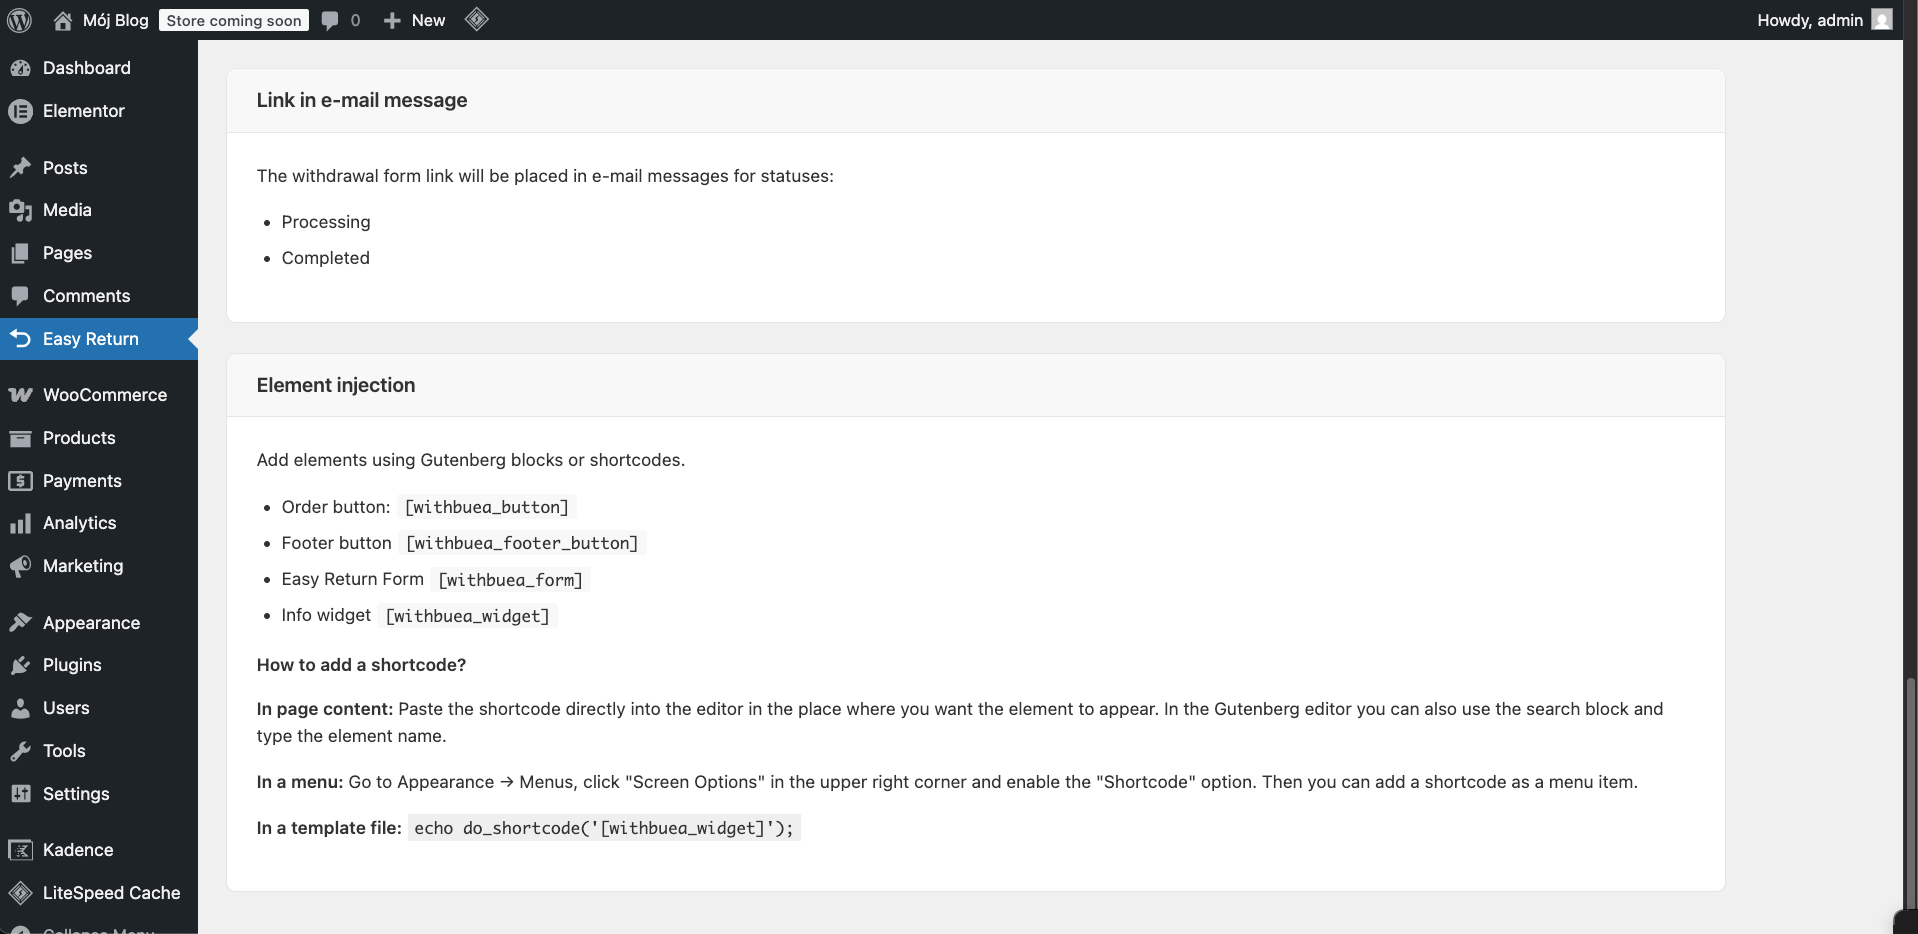
Link in e-mail message
The return form link will be placed automatically in e-mail messages for the selected order statuses (Processing, Completed by default).
Shortcodes
All elements can also be added manually using Gutenberg blocks or shortcodes:
- Order button - [withbuea_button]
- Footer button - [withbuea_footer_button]
- Easy Return Form - [withbuea_form]
- Info Widget - [withbuea_widget]
In page content
Paste the shortcode directly into the editor where you want the element to appear. In the Gutenberg editor you can also search for the block by typing the element name.
In a menu
Go to Appearance → Menus, click Screen Options in the upper right corner, enable the Shortcode option, then add the shortcode as a menu item.
In a template file
echo do_shortcode('[withbuea_widget]');
Information and Support
The last tab contains plugin version information, license details, and links to support resources. No configuration is required here.