How it works — Shopify
A complete walkthrough of the return process - from the customer's first click on the storefront to the merchant reviewing the request inside the Shopify order.
Customer flow
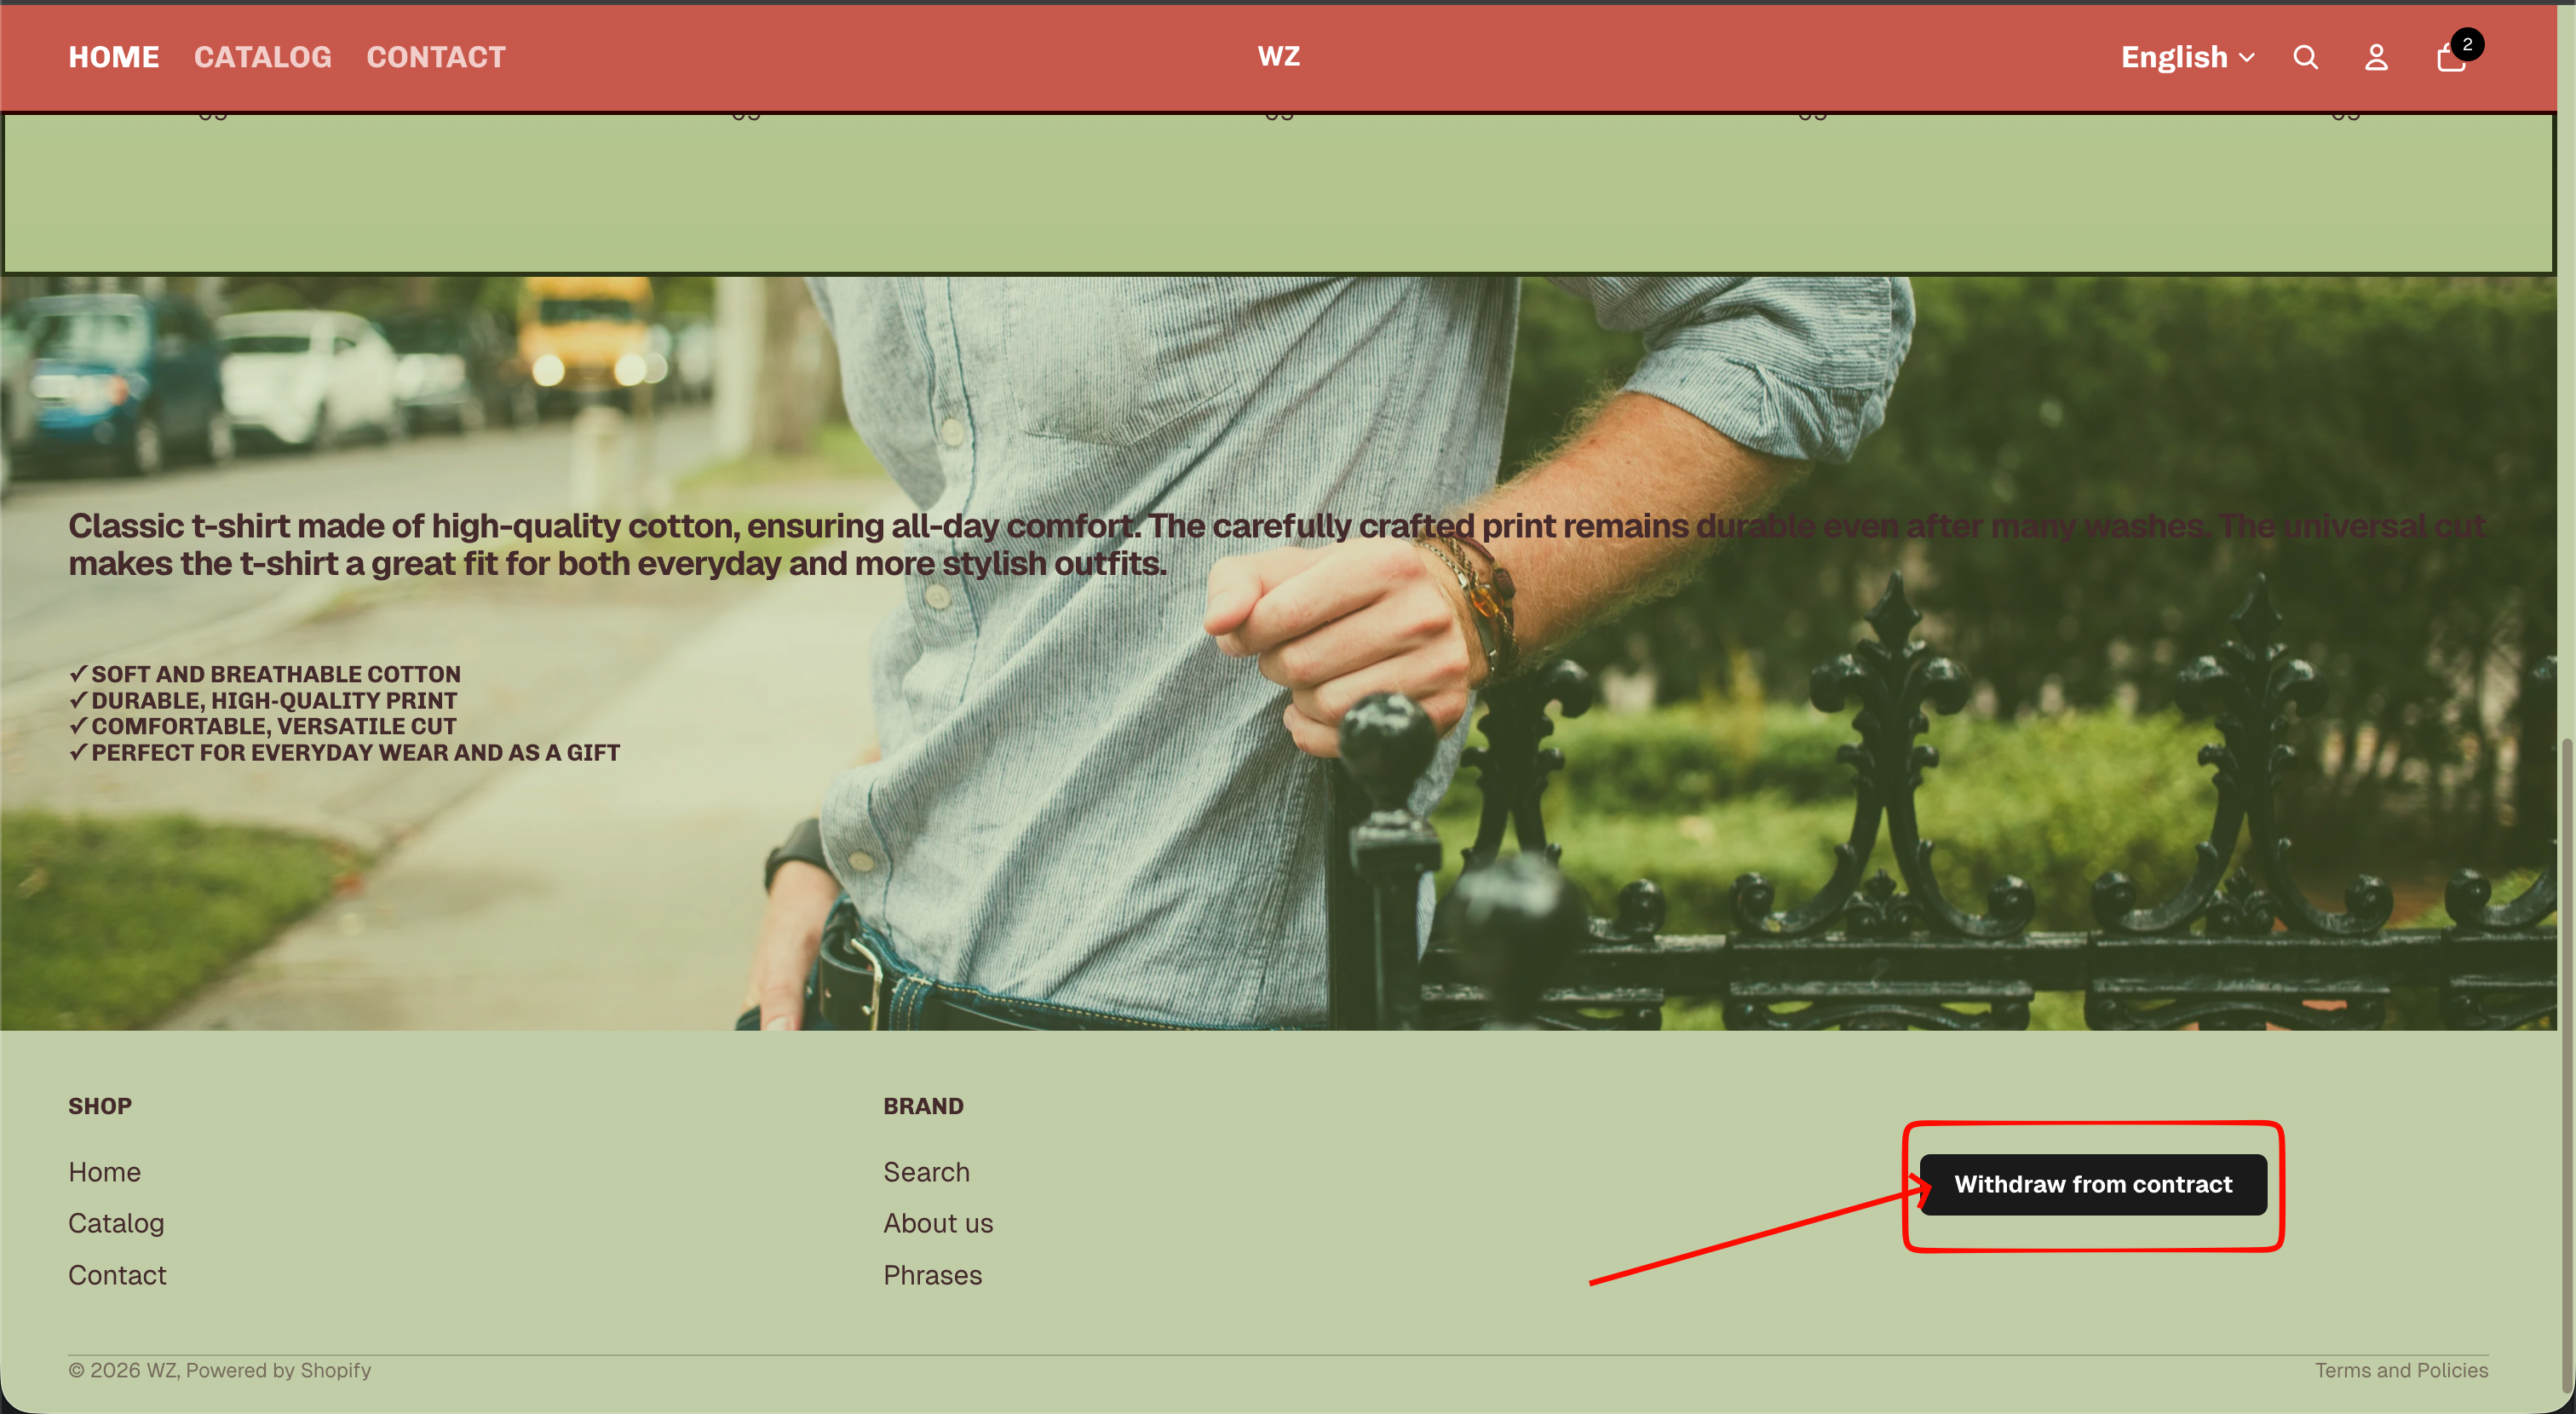
The Withdraw from contract button appears on the storefront - in the footer on every page, and optionally on the order details page. No account is required: any customer can locate their order and submit a withdrawal.
Open the withdrawal form
The customer clicks the 'Withdraw from contract' button in the store footer. They are redirected to the dedicated withdrawal form page.
Find the order
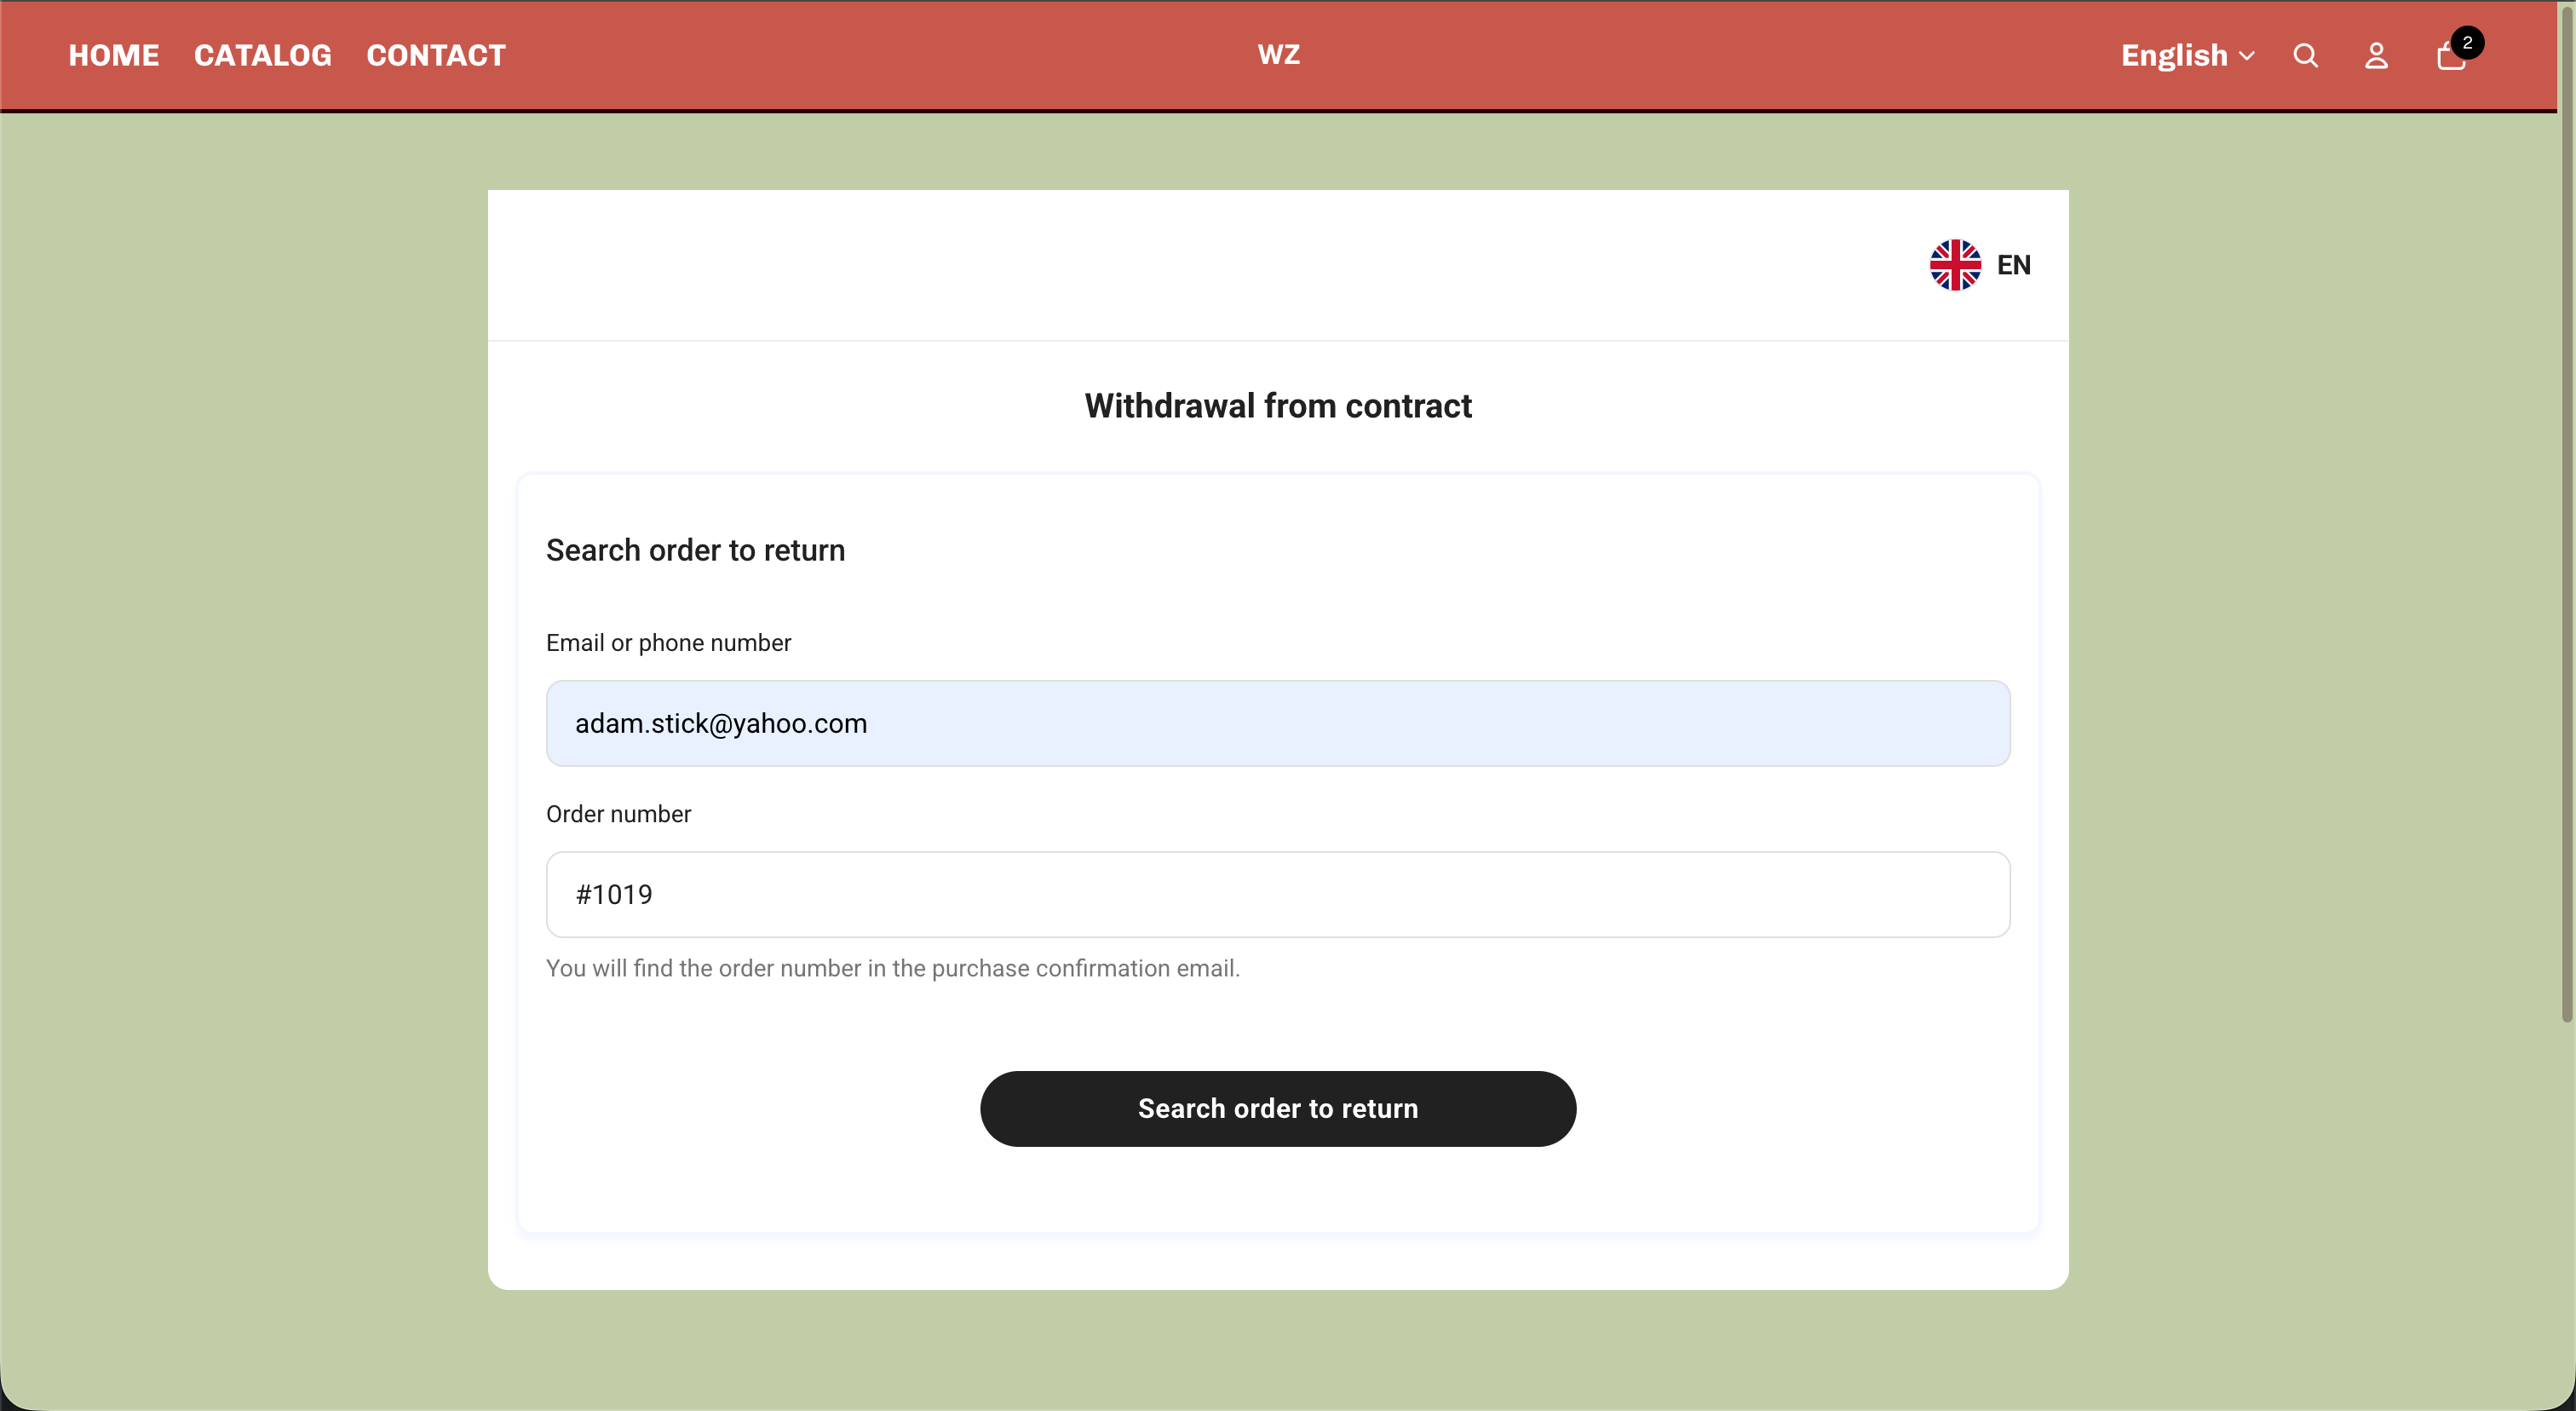
The customer enters the email or phone number used at checkout together with the order number. EasyReturn uses these to locate and verify the order.
Select products and reason
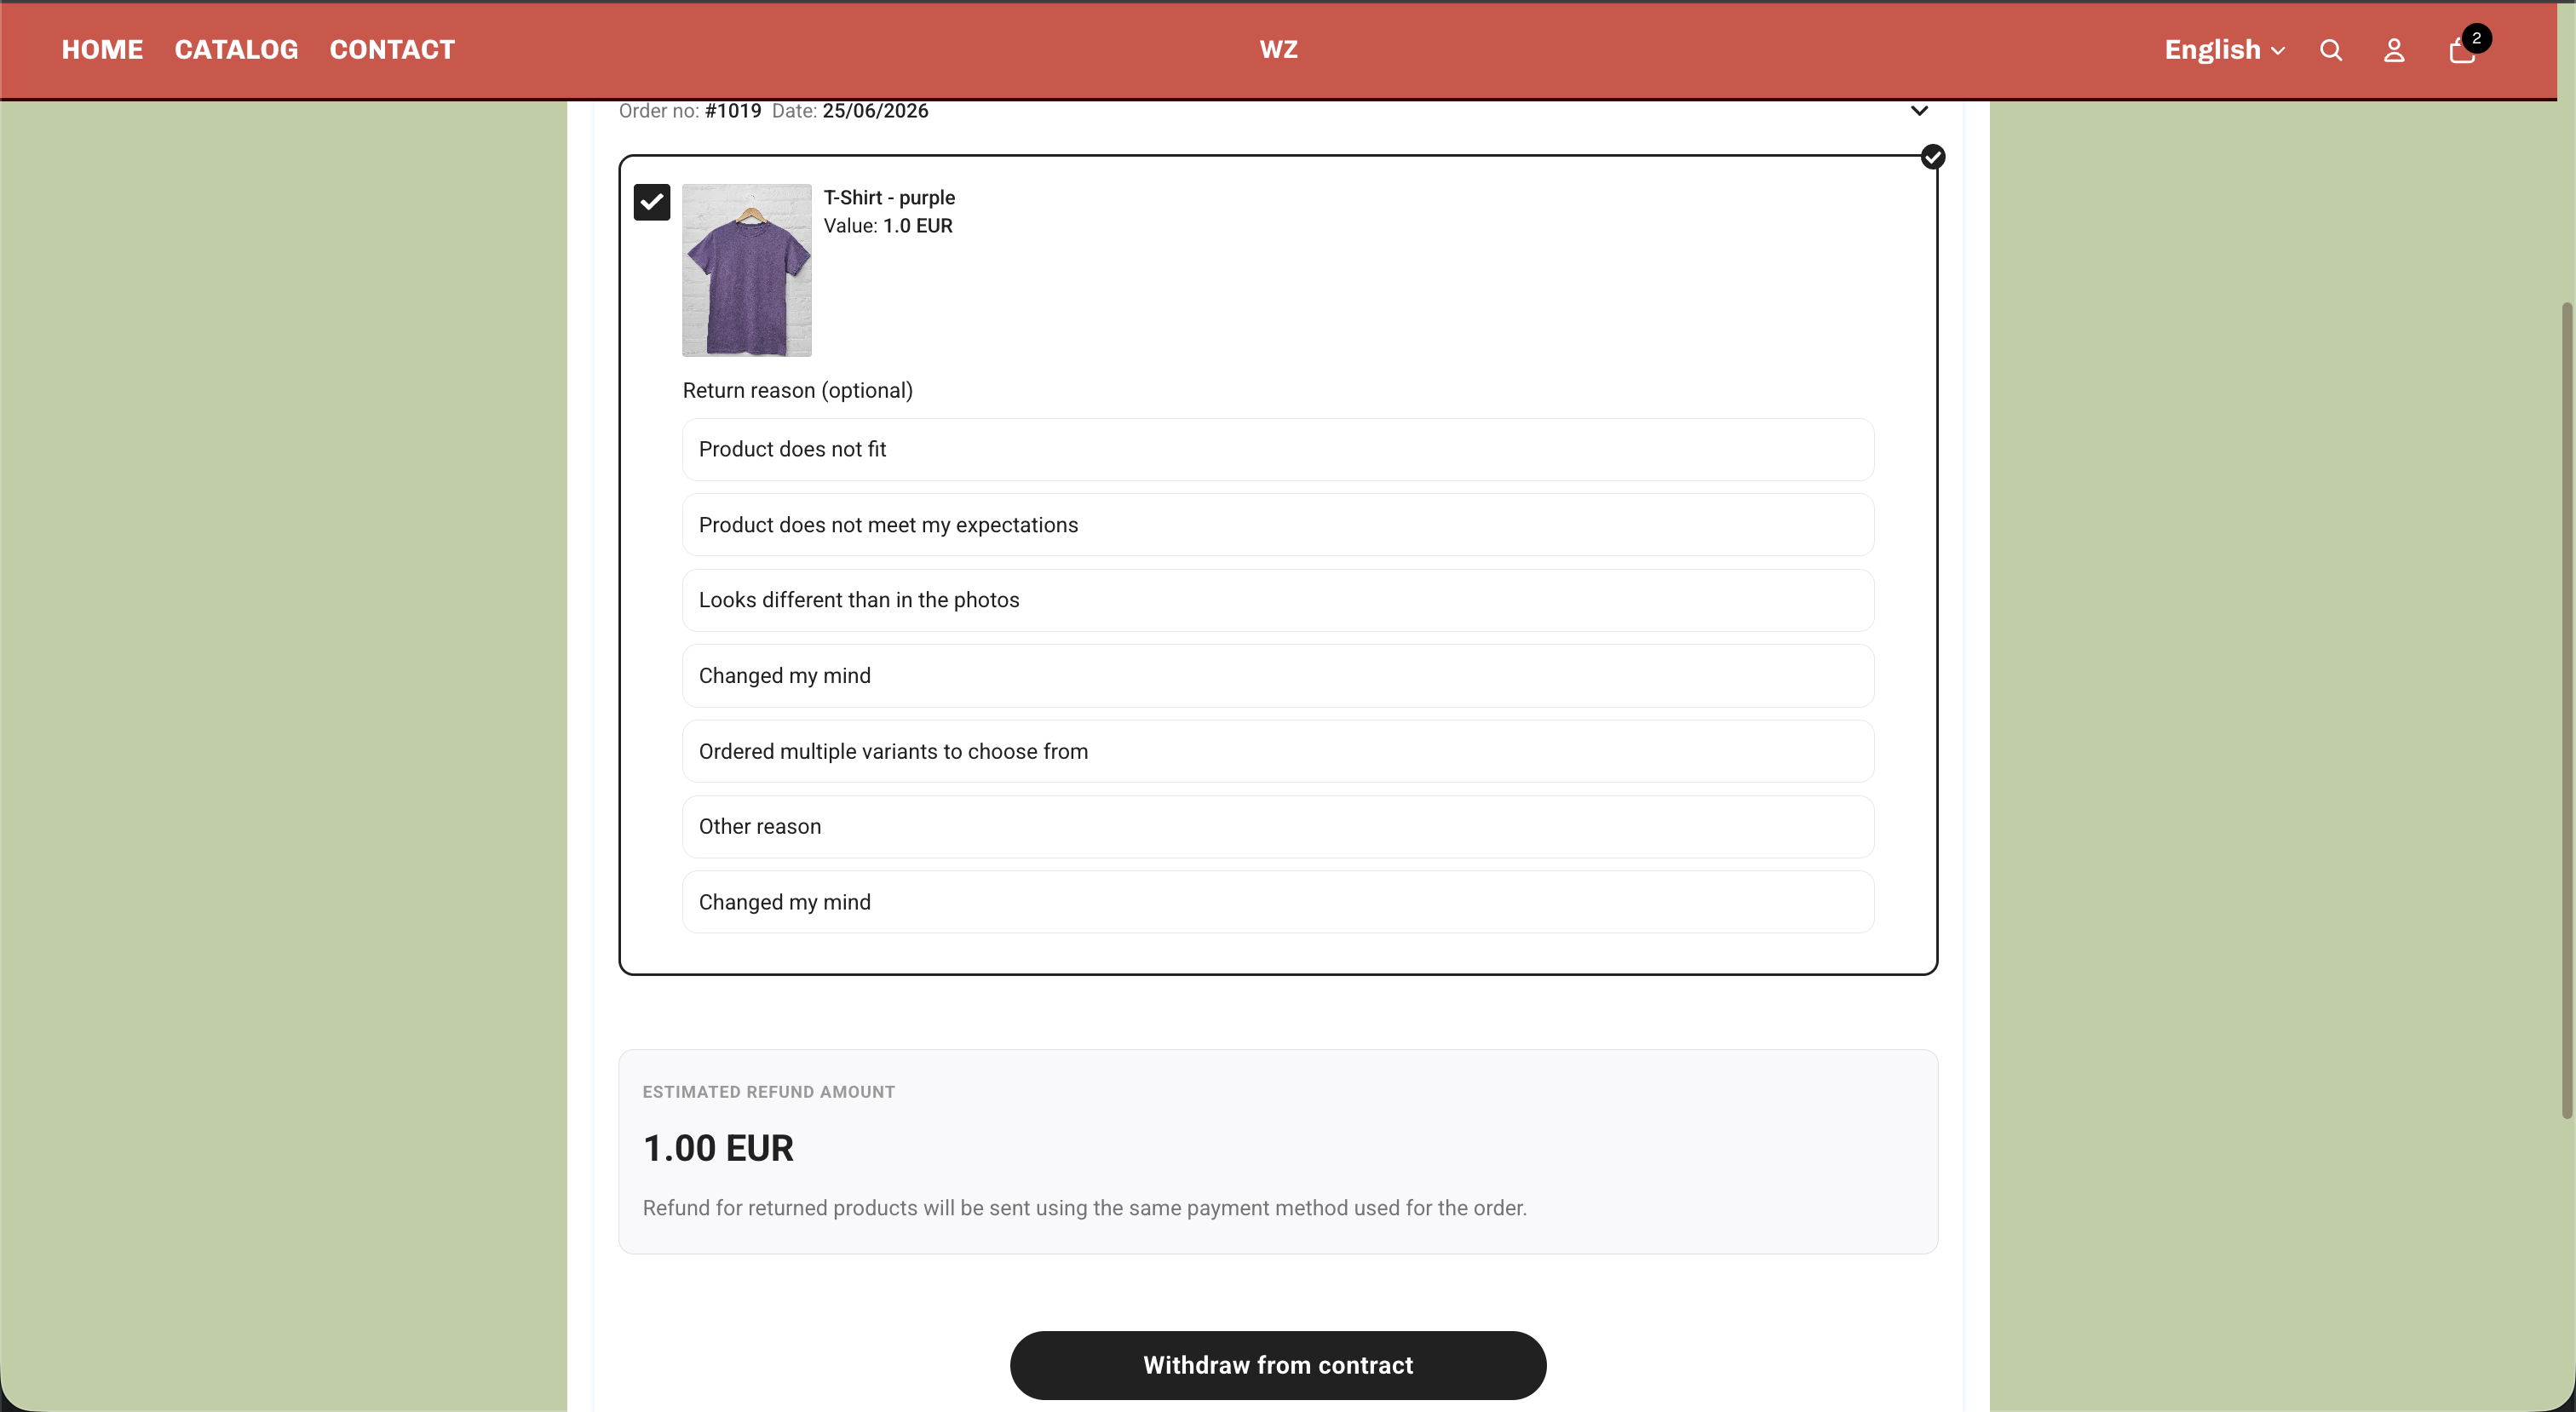
After the order is verified, the customer selects the products to return and optionally picks a return reason for each item. The estimated refund amount is calculated in real time and refunds use the original payment method.
Confirm and submit
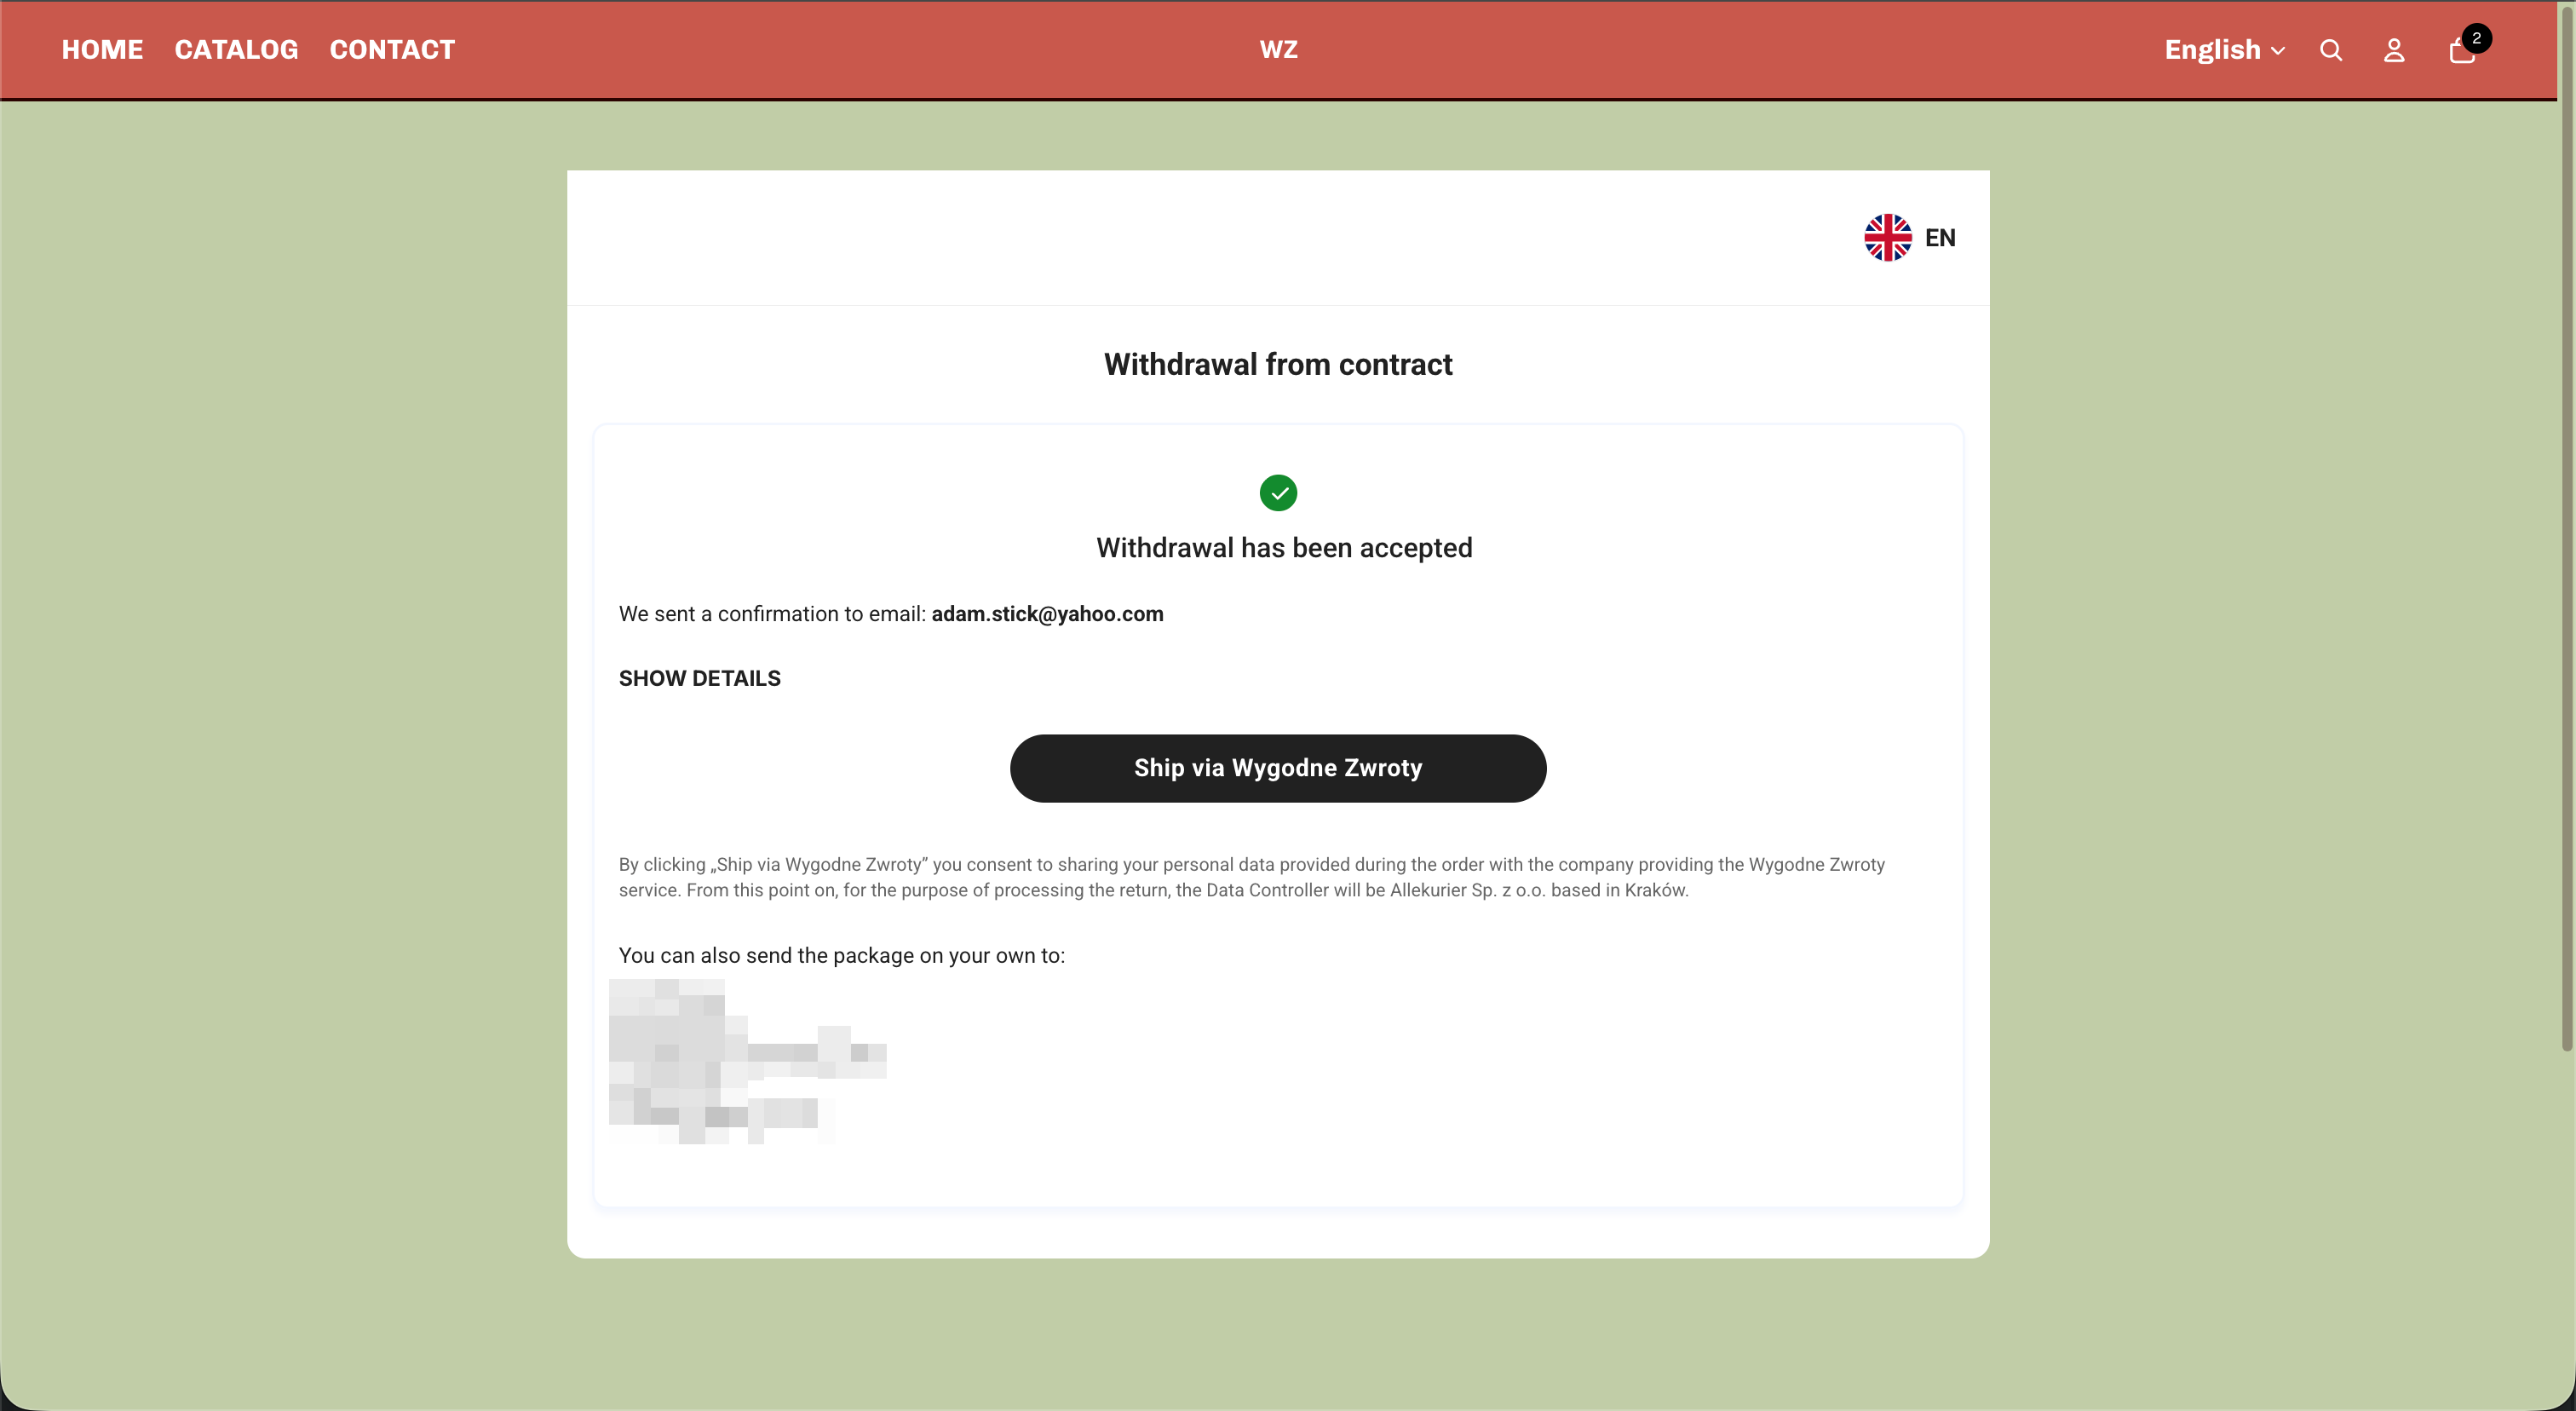
After submitting, the customer sees a confirmation that the withdrawal has been accepted and a confirmation email is sent automatically. If carrier integration is enabled, a 'Ship via Wygodne Zwroty' button lets them create a return shipment instantly - otherwise the store's return address is shown for self-shipping.
Admin flow
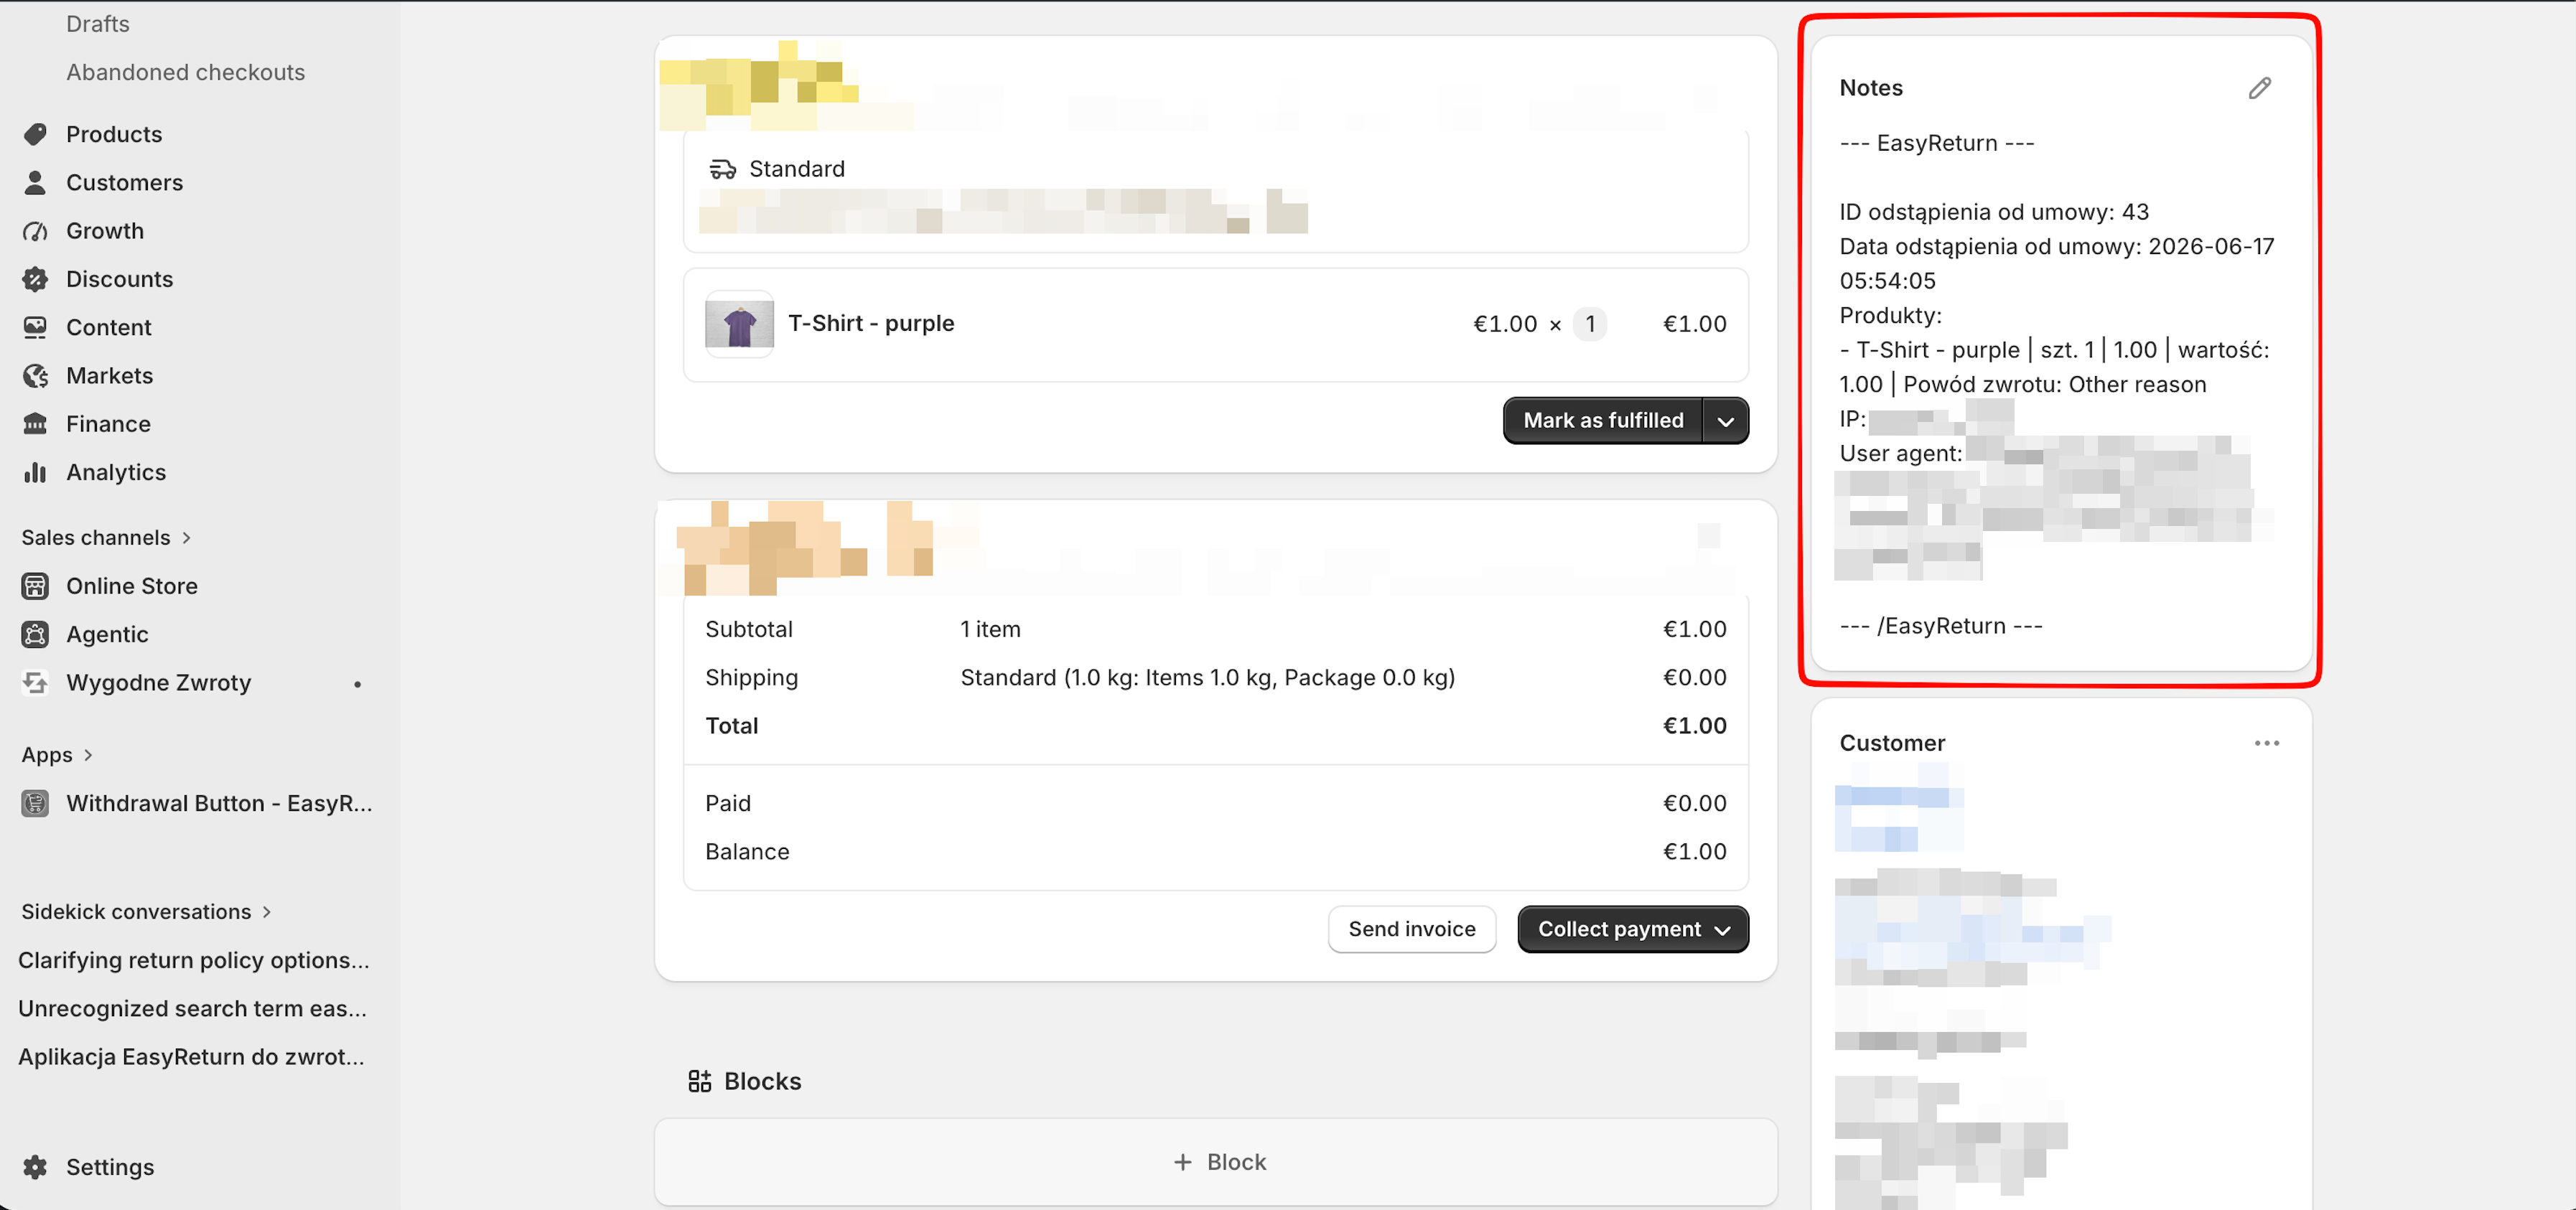
Review the request inside the Shopify order
Each submitted withdrawal is written to the order's Notes section, prefixed with --- EasyReturn ---. It includes the withdrawal ID, submission date, returned products with reasons, refund value, and technical metadata (IP and user agent) for compliance documentation.
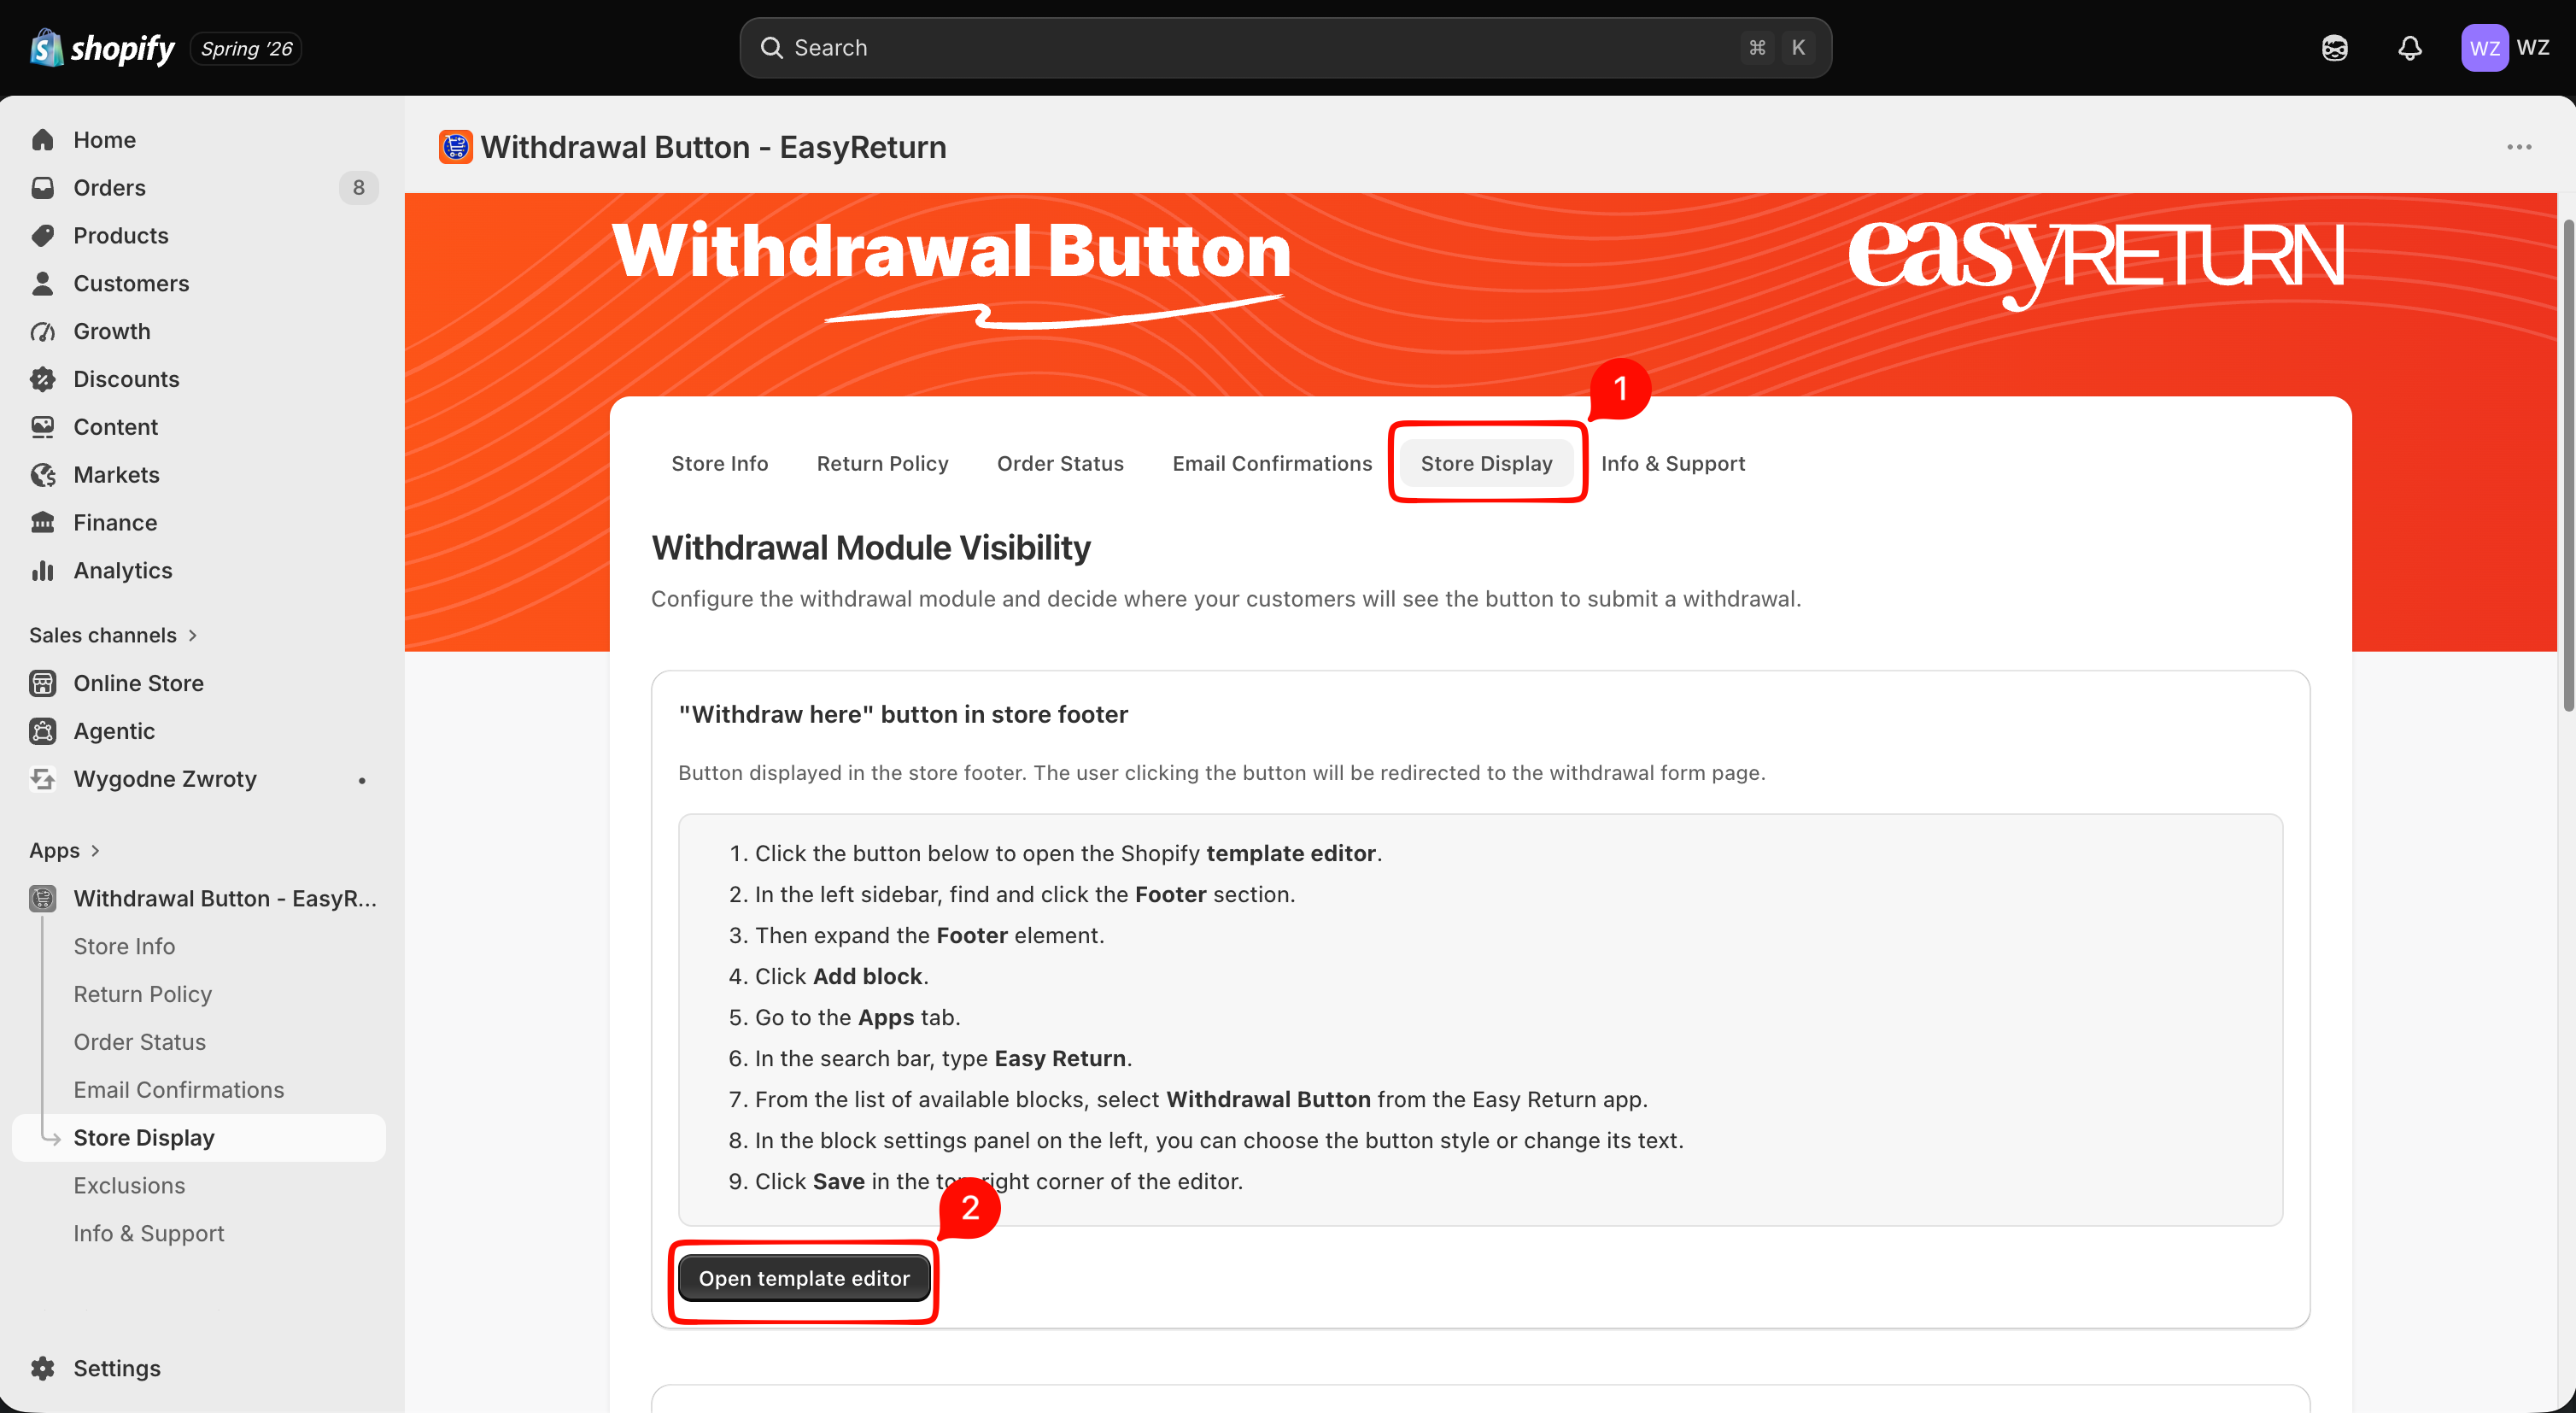
Add the withdrawal button to your storefront
From the Store Display tab, click 'Open template editor' to jump straight into the Shopify theme editor at the right place.
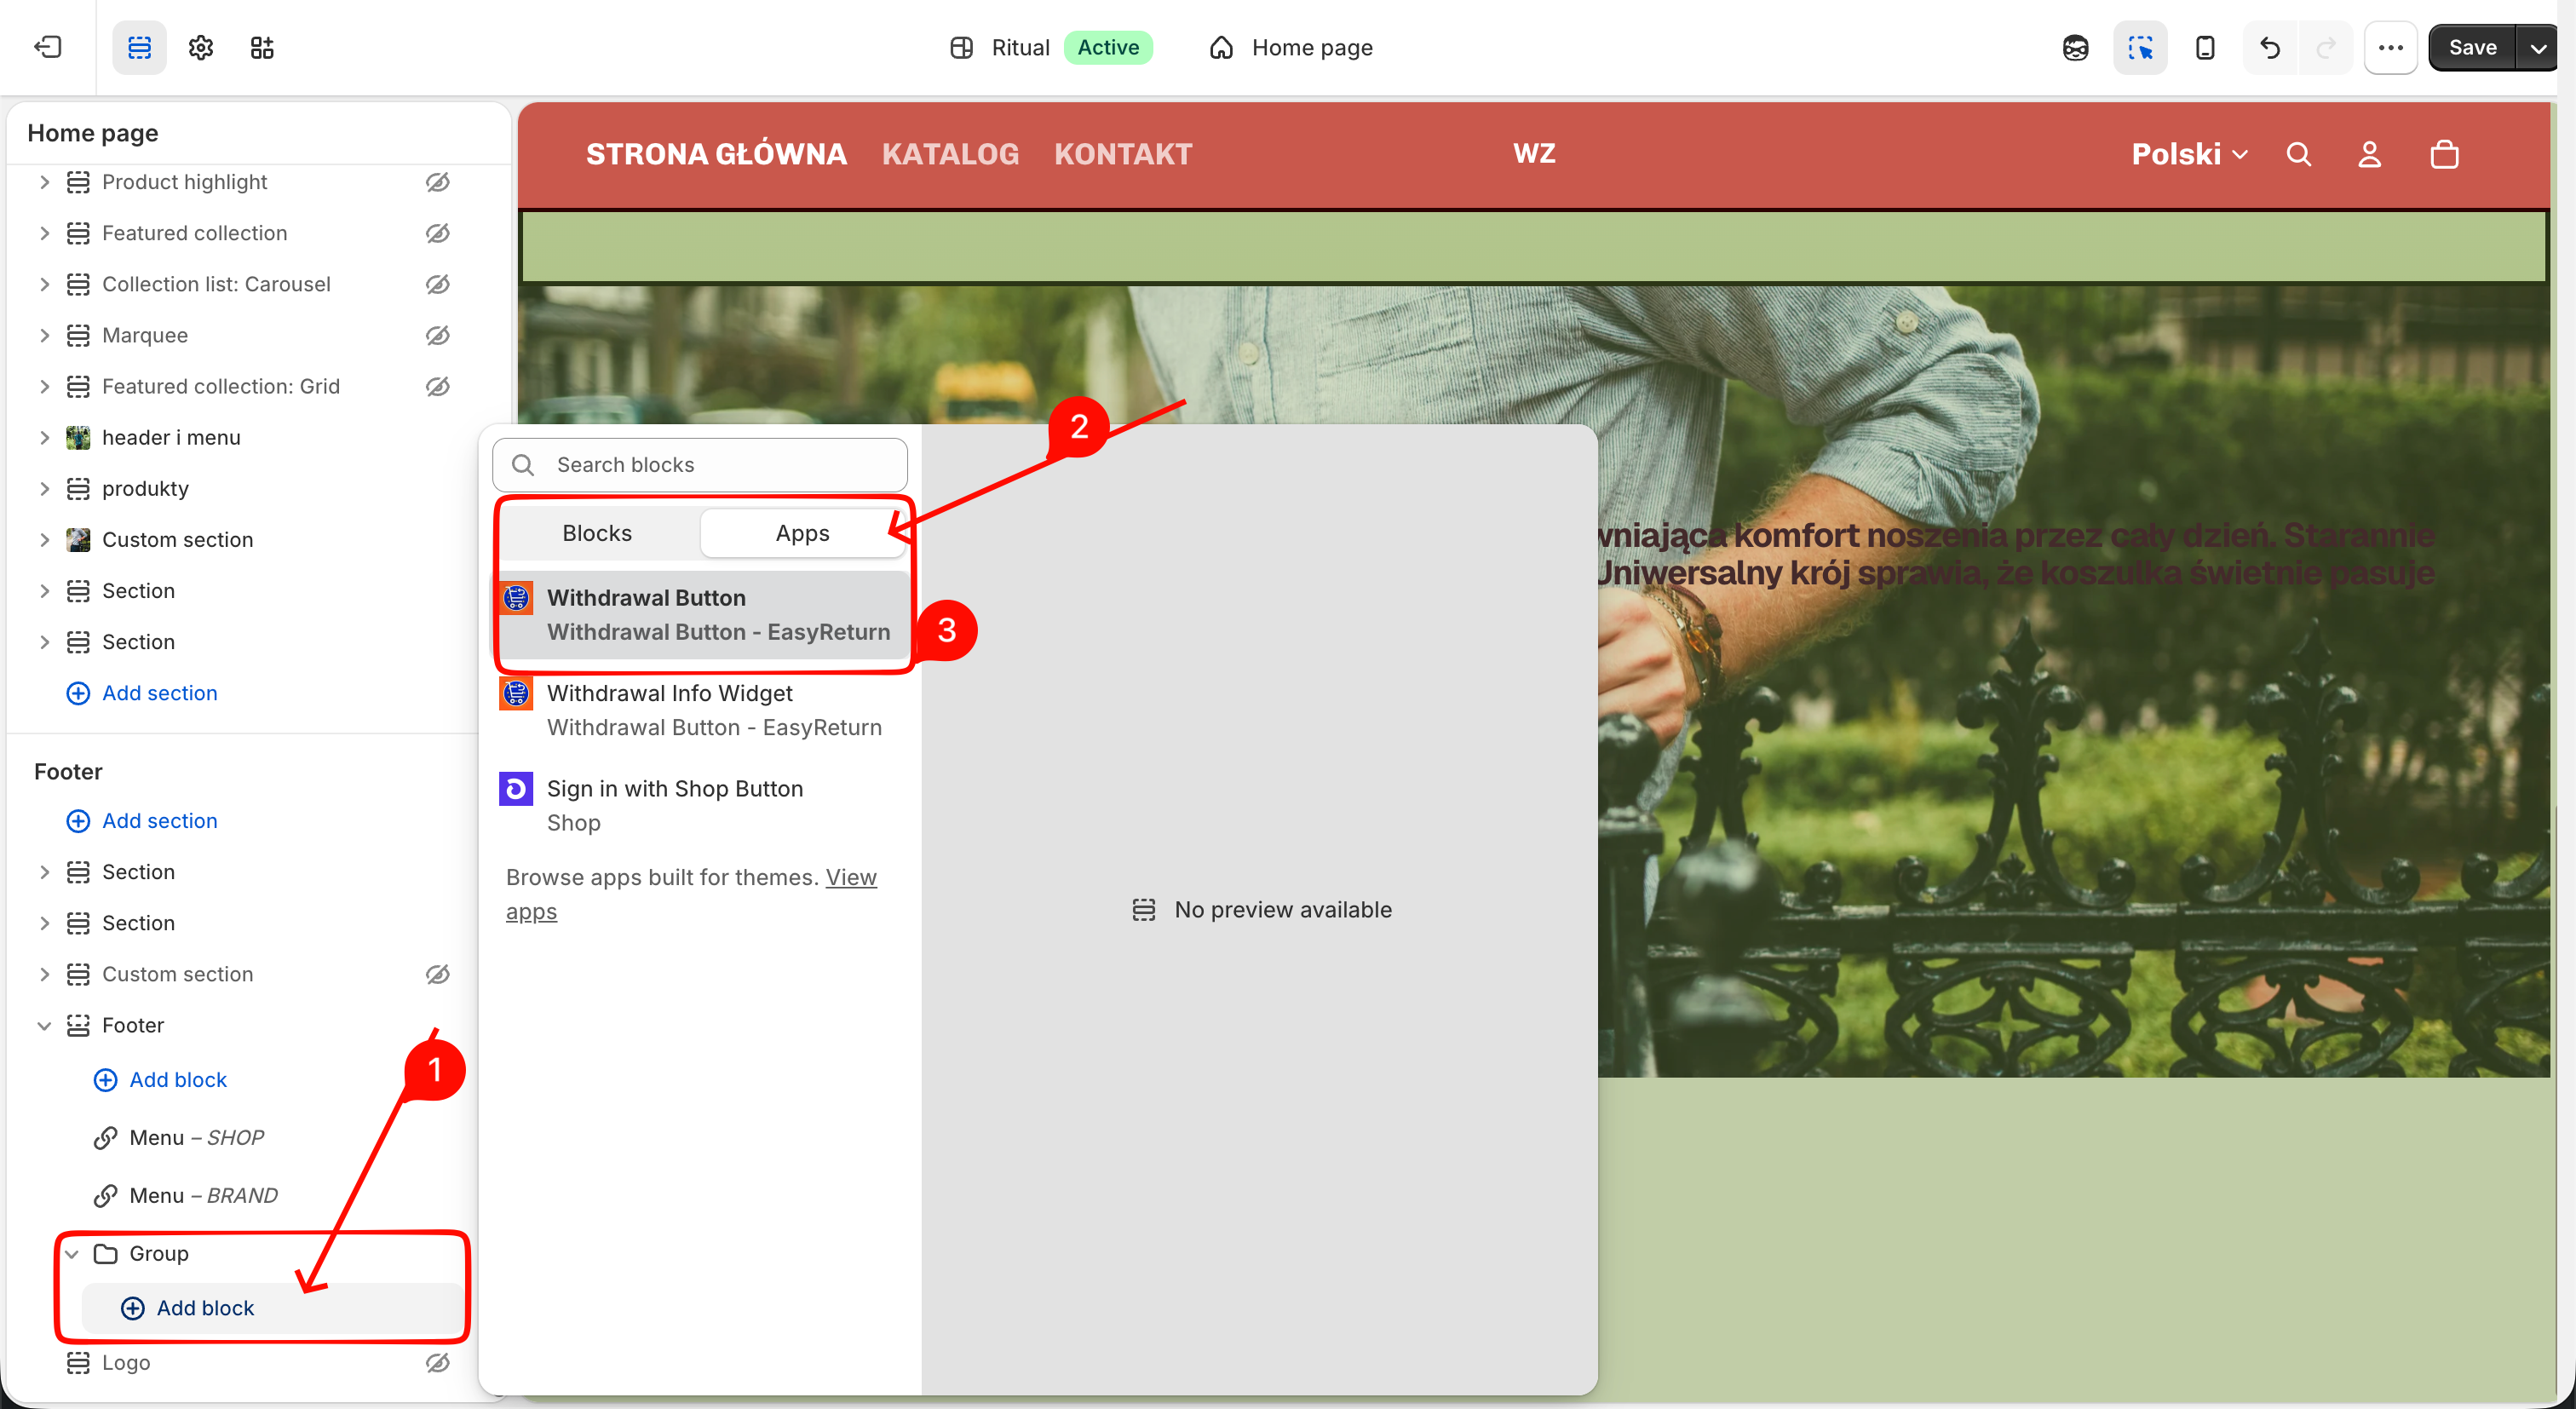
Insert the Withdrawal Button block
In the theme editor, click 'Add block', search for Easy Return, and add the 'Withdrawal Button' app block. Adjust its style or label in the block settings, then save.
Data flow
Recorded on the order
Every withdrawal request is saved to the corresponding Shopify order's Notes and, optionally, tagged for easy filtering. The merchant manages everything from the standard Shopify order view.
Email confirmation
A confirmation email is sent to the customer automatically on submission, using the template configured in the Email Confirmations tab. The store can also receive a notification for each new request.